
Copyright 2026 © Leading Tools Industrial Co., Ltd.
All Rights Reserved. Website Design by Awakening Design
CATALOG TYPE
Product Categories
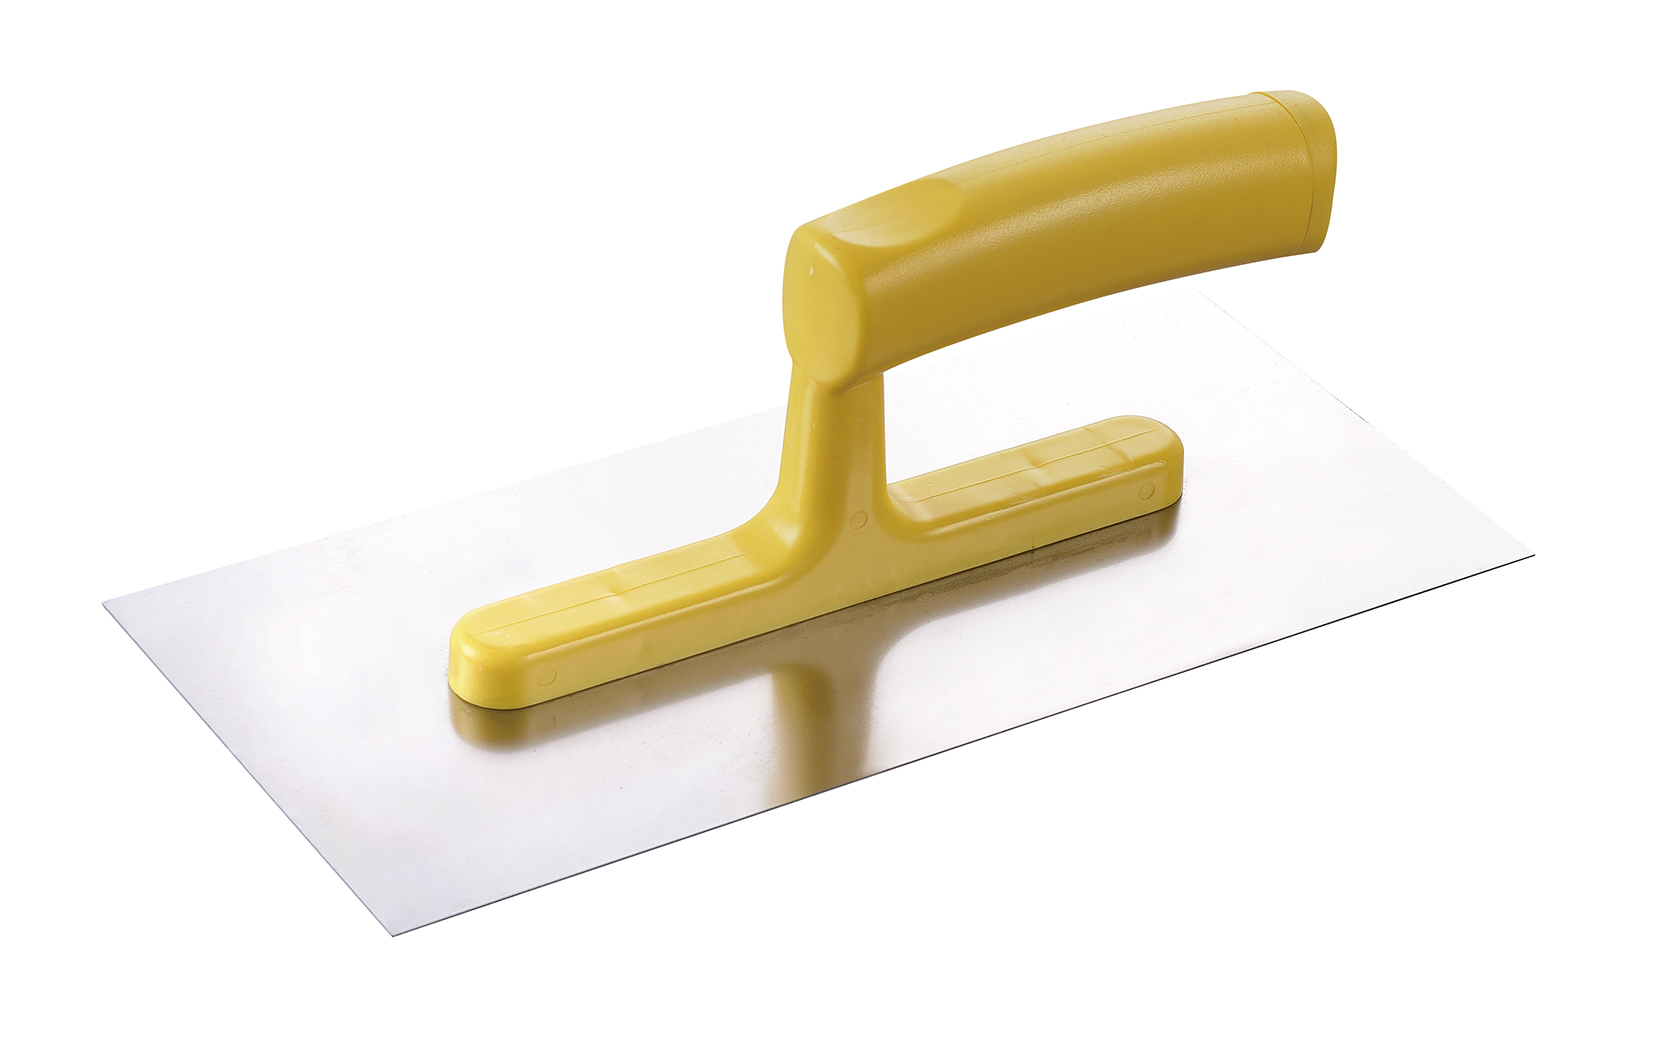
DIY Trowel — 130 × 280 mm
Product Description
| Item | Detail |
|---|---|
| Product name | DIY Trowel |
| Article number | 700010 |
| Product family | Plaster Trowel |
| Size | 130 mm × 280 mm blade |
| Construction | Spot Riveted, Light Weight |
| Blade material | Contact sales |
| Handle | One-piece molded plastic handle and shank, yellow |
| Note | Quality Consistent |
The DIY Trowel 700010 is the metric-sized member of the Leading Tools DIY plastering trowel group. It is a flat, unnotched rectangular blade with Spot Riveted construction; for the blade material, contact sales. Its purpose is straightforward: load material onto a wall or ceiling, spread it, and level it.
| Advantage | What it means on the job | Who benefits most |
|---|---|---|
| Low blade and handle mass | The forearm, not the blade, is the limiting factor on overhead work; a light tool buys working minutes before a break is needed | DIY users, maintenance crews, ceiling patch work |
| 130 mm × 280 mm working face | Wide enough to cover a patch in two or three passes, short enough to work around door casings, switch boxes and pipework | Renovation and repair work |
| Square corners | The user can round the corners to their own preference | Users who want to tune the tool |
| Task | Suitable? | Notes |
|---|---|---|
| Spreading base coats and filler material | Yes | The core job of a flat unnotched blade |
| Leveling and flattening a fresh coat | Yes | Long strokes at a shallow angle |
| Patching small damaged areas | Yes | The 130 mm width covers most domestic patches |
| Spreading cement-lime render | Yes | Same laying-on and leveling motion |
| Spreading thin-bed tile adhesive over a small area | Partly | The flat blade can spread it, but the bed must then be combed with a notched trowel |
| Combing tile adhesive to a set bed depth | No | Requires a notched trowel sized to the tile |
| High-gloss closing / polishing pass | Not ideal | Wants a thin flexible finishing blade with rounded corners |
| Full-wall production plastering | Not ideal | A heavier, larger professional blade is faster and flatter |
The blade has square corners. If the finish quality matters, take the corners and the leading long edge back with abrasive paper or an oil stone until they carry a slight radius, which is what stops the tool scoring tramlines into wet material at the edge of each pass. If the tool will only be used for rough spreading and patching, this step can be skipped.
| Step | Action | Notes |
|---|---|---|
| 1. Load material | Take material from a hawk with the blade edge, scraping off the excess against the hawk | An overloaded blade drops material and applies unevenly |
| 2. Lay on | Press the material onto the surface with the blade at roughly 20–30° to the wall and push in long strokes | The laying-on stage uses the steepest angle of the three |
| 3. Level | Close the angle to roughly 10–15° and pull across the coat to flatten it | Keep the angle constant through the whole stroke or the coat varies in thickness |
| 4. Close | Reduce to roughly 5–10° with light pressure for the final pass | Too much pressure at this stage pulls material off rather than smoothing it |
| 5. Overlap | Let each stroke overlap the previous one slightly | Prevents ridges at the pass boundaries |
| 6. Clean | Wipe or scrape the blade regularly during the job | Dried material on the blade transfers marks straight into the fresh coat |
Use small repeated loads, rather than one heavy load. Angle is set by the stage of the work, not by the grade of the tool: the laying-on, levelling and closing angles above apply the same way whether the trowel is a DIY model or a professional one.
A hawk (mortar board) is the natural partner to this trowel and it changes how tiring the job is. Hold the hawk close to the body and level, so the trowel can scoop material off the board in one motion and carry it straight to the wall; driving the motion from the elbow rather than the wrist is what reduces fatigue over a long session.
Gypsum plaster (base and finish coats), cement-lime renders, patching and filling compounds, thin-bed tile adhesive (spreading stage only), and small mortar repairs.
Remove all loose and friable material and dampen the substrate. Load the trowel from a hawk and press the compound in at roughly 20–30°, slightly overfilling the damaged area. Once the material has taken its initial set, come back with the blade at a flatter angle and level it flush with the surrounding wall. Let it cure before sanding.
The wide flat blade is useful for getting adhesive onto the substrate quickly, but the bed must then be combed with a notched trowel before tiles go on; notch size is chosen by tile size. Work in sections so the adhesive does not skin over.
The light build is the reason to reach for this tool overhead. Overhead plastering is a repetitive wrist-loading task and a risk factor for musculoskeletal disorders, so plan the work in short sessions with breaks rather than one continuous push.
Use the hawk-and-trowel combination to keep material under control instead of reloading constantly. Bracing the free hand lightly against the ceiling steadies the body and takes some of the load off the working wrist.
Varying the blade angle and pressure across a fresh coat produces different surface patterns, and circular motions produce a stippled effect. Always test the pattern on a sample board or an inconspicuous area before committing to a wall.
Q1. Should I order carbon steel or stainless steel?
A. Each art number corresponds to one blade material; contact Leading Tools sales to confirm the material of 700010. As a guide, stainless suits users whose tool will not be dried and oiled after every use, if the site is humid, or if you are skimming gypsum onto pale finishes. Carbon steel suits users who will dry and oil the tool after every use.
Q2. Why are the blade corners square, and is that a defect?
A. No. The blade has square corners. Square corners can score parallel lines into wet material on a fine pass, so the usual fix is to round them slightly with sandpaper or an oil stone before use, which also lets you set the radius you prefer.
Q3. Can I use this trowel for tile adhesive?
A. For spreading, yes. For combing the adhesive to a controlled depth, no: that needs a notched trowel with a notch size matched to the tile. For that work, Leading Tools offers the German Standard Notched Trowel (702301-74 to -82).
Q4. My arm tires quickly on ceiling work.
A. Overhead plastering is repetitive, tiring work, so work in shorter sessions with breaks. Drive the stroke from the elbow rather than the wrist, use a hawk so you are not constantly returning to the bucket, and relax the grip, because over-gripping tires the hand faster than the work does.
Q5. How is this different from the DIY Trowel 611510?
A. Size. 611510 is the smaller imperial-sized DIY trowel (4-1/2" × 10-1/2"); 700010 is the wider metric 130 × 280 mm blade. Construction, material options and positioning are the same.
| Item | Detail |
|---|---|
| Product name | DIY Trowel |
| Article number | 700010 |
| Blade size | 130 mm × 280 mm (approx. 5-1/8" × 11", 1" = 25.4 mm) |
| Blade shape | Flat rectangle, unnotched |
| Blade corners | Square, not rounded |
| Construction | Spot Riveted, Light Weight |
| Blade material | Contact sales |
| Handle | One-piece molded plastic handle and spine, yellow |
| Note | Quality Consistent |
The blade is a flat rectangle with no teeth, so it spreads and levels material rather than combing it into ridges. Its job is the laying-on and leveling stage of a plaster or render coat, and light patching work.
The blade corners are square. Square corners can drag parallel score lines ("tramlines") through wet material at the edge of each pass, so for a fine closing finish, take the corners back with abrasive paper or an oil stone until they carry a small radius before the first job. For spreading, leveling and patching, the work this tool is aimed at; the square corners are not a problem and give a cleaner cut into internal angles.
A single molded plastic piece forms the bridge grip and the long mounting spine. The blade is Spot Riveted. The result is a light tool. The spine distributes hand pressure over most of the blade length rather than at a single mounting boss, which helps keep a light blade flat under load.
Each art number corresponds to one blade material; contact Leading Tools sales to confirm the material of 700010. The comparison below is for reference.
| Version | Handling character | Maintenance requirement | Best fit |
|---|---|---|---|
| Carbon Steel | Blade rusts if left damp | Must be wiped dry after every use and oiled periodically, or rust spotting appears; never leave it damp overnight | Dry-site repair work; users who will maintain the tool |
| Stainless Steel | Blade resists rust | High corrosion resistance and low maintenance; chlorinated water, coastal air or prolonged soaking can still cause rust spots, so rinse with clean water and dry after use | Humid sites, wet cleanup, gypsum skim coats, occasional and DIY users who will not oil a blade |
A light plastering trowel earns its place when the user does not plaster daily, when fatigue rather than coverage rate is the limiting factor, when the work is a series of small repairs rather than one large wall, and when overhead or ladder work makes tool control harder than tool speed.
Overhead plastering is a repetitive wrist-loading task and a risk factor for musculoskeletal disorders, which is the practical reason to work overhead in shorter sessions. The trade-off is real: a light blade feels less planted under sustained production work than a heavier professional finishing trowel.
| Situation | Recommendation |
|---|---|
| DIY / home renovation projects | Ideal: light, one tool covers spreading and leveling |
| Occasional or seasonal use | Good: easy to store; a stainless blade needs little upkeep |
| Small-area patching and repair | Suitable: the 130 mm width handles patches and reaches around obstructions |
| Ceiling and overhead patching | Suitable in short sessions: light build helps, but plan for breaks |
| Full-wall production plastering | Consider a larger, heavier professional trowel instead |
| High-gloss closing pass | Consider a finishing trowel with a chamfered edge |
| Combing tile adhesive | Use a notched trowel; notch size is set by tile size |
| Daily professional use | Consider a heavier professional trowel |
Two questions decide which blade material suits the job; confirm the material of 700010 with sales. First: will the tool be cleaned and dried after every single use? If not, stainless is the safer material: carbon steel that sits damp will spot with rust. Second: what material is being applied?
Gypsum skim coats on pale finishes are the classic case for stainless, because carbon steel can leave oxide marks. Carbon steel suits a user who will dry and oil the tool after every use.
Beginners should start at a middle size, around 11" or 13" (roughly 280–330 mm), rather than reaching for the largest blade, because a big blade is harder to keep flat and control. At 280 mm the 700010 sits at the bottom of that recommended entry band, which is consistent with its DIY positioning.
| Article | What it is | Choose it instead when |
|---|---|---|
| DIY Trowel 611510 | Smaller DIY trowel, 4-1/2" × 10-1/2" | The work is finer patching and the smaller imperial-sized blade is wanted |
| Finishing Trowel 690721 | Professional finishing trowel with soft-grip handle | The job needs a proper closing and polishing pass |
| German Standard Notched Trowel 702301-74 to -82 | Notched trowels for tile adhesive | Adhesive must be combed to a set bed depth |
This family has one article number.
| ART. Nr | Blade size | Blade size (imperial, 1" = 25.4 mm) | Blade material | Handle | Construction |
|---|---|---|---|---|---|
| 700010 | 130 mm × 280 mm | approx. 5-1/8" × 11" | Contact sales | One-piece molded plastic, yellow | Spot Riveted, Light Weight |
Note on total length: the 130 mm × 280 mm dimension is the blade face. It is the working dimension buyers compare across brands, and it is not an overall tool length.
| Material on the blade | Cleaning method |
|---|---|
| Wet plaster or mortar | Scrape off immediately, then wash with water and dry fully |
| Cured material | Soak in water to soften, then scrape; avoid gouging the blade face |
| Tile adhesive | Remove mechanically while still soft; avoid solvents on the plastic handle |
| General | Wash, dry completely, store dry |
Wipe the plastic handle with a damp cloth; do not use solvents. Avoid dropping the tool on hard floors, as molded plastic can crack at the spine. Check the handle-to-blade connection periodically and take the tool out of service if the spine has cracked or the handle has loosened from the blade.
A cracked spine or a loose handle-to-blade connection means the whole tool should be replaced.
| Item | Detail |
|---|---|
| Product name | DIY Trowel |
| Article number | 700010 |
| Product family | Plaster Trowel |
| Size | 130 mm × 280 mm blade |
| Construction | Spot Riveted, Light Weight |
| Blade material | Contact sales |
| Handle | One-piece molded plastic handle and shank, yellow |
| Note | Quality Consistent |
The DIY Trowel 700010 is the metric-sized member of the Leading Tools DIY plastering trowel group. It is a flat, unnotched rectangular blade with Spot Riveted construction; for the blade material, contact sales. Its purpose is straightforward: load material onto a wall or ceiling, spread it, and level it.
| Advantage | What it means on the job | Who benefits most |
|---|---|---|
| Low blade and handle mass | The forearm, not the blade, is the limiting factor on overhead work; a light tool buys working minutes before a break is needed | DIY users, maintenance crews, ceiling patch work |
| 130 mm × 280 mm working face | Wide enough to cover a patch in two or three passes, short enough to work around door casings, switch boxes and pipework | Renovation and repair work |
| Square corners | The user can round the corners to their own preference | Users who want to tune the tool |
| Task | Suitable? | Notes |
|---|---|---|
| Spreading base coats and filler material | Yes | The core job of a flat unnotched blade |
| Leveling and flattening a fresh coat | Yes | Long strokes at a shallow angle |
| Patching small damaged areas | Yes | The 130 mm width covers most domestic patches |
| Spreading cement-lime render | Yes | Same laying-on and leveling motion |
| Spreading thin-bed tile adhesive over a small area | Partly | The flat blade can spread it, but the bed must then be combed with a notched trowel |
| Combing tile adhesive to a set bed depth | No | Requires a notched trowel sized to the tile |
| High-gloss closing / polishing pass | Not ideal | Wants a thin flexible finishing blade with rounded corners |
| Full-wall production plastering | Not ideal | A heavier, larger professional blade is faster and flatter |
The blade has square corners. If the finish quality matters, take the corners and the leading long edge back with abrasive paper or an oil stone until they carry a slight radius, which is what stops the tool scoring tramlines into wet material at the edge of each pass. If the tool will only be used for rough spreading and patching, this step can be skipped.
| Step | Action | Notes |
|---|---|---|
| 1. Load material | Take material from a hawk with the blade edge, scraping off the excess against the hawk | An overloaded blade drops material and applies unevenly |
| 2. Lay on | Press the material onto the surface with the blade at roughly 20–30° to the wall and push in long strokes | The laying-on stage uses the steepest angle of the three |
| 3. Level | Close the angle to roughly 10–15° and pull across the coat to flatten it | Keep the angle constant through the whole stroke or the coat varies in thickness |
| 4. Close | Reduce to roughly 5–10° with light pressure for the final pass | Too much pressure at this stage pulls material off rather than smoothing it |
| 5. Overlap | Let each stroke overlap the previous one slightly | Prevents ridges at the pass boundaries |
| 6. Clean | Wipe or scrape the blade regularly during the job | Dried material on the blade transfers marks straight into the fresh coat |
Use small repeated loads, rather than one heavy load. Angle is set by the stage of the work, not by the grade of the tool: the laying-on, levelling and closing angles above apply the same way whether the trowel is a DIY model or a professional one.
A hawk (mortar board) is the natural partner to this trowel and it changes how tiring the job is. Hold the hawk close to the body and level, so the trowel can scoop material off the board in one motion and carry it straight to the wall; driving the motion from the elbow rather than the wrist is what reduces fatigue over a long session.
Gypsum plaster (base and finish coats), cement-lime renders, patching and filling compounds, thin-bed tile adhesive (spreading stage only), and small mortar repairs.
Remove all loose and friable material and dampen the substrate. Load the trowel from a hawk and press the compound in at roughly 20–30°, slightly overfilling the damaged area. Once the material has taken its initial set, come back with the blade at a flatter angle and level it flush with the surrounding wall. Let it cure before sanding.
The wide flat blade is useful for getting adhesive onto the substrate quickly, but the bed must then be combed with a notched trowel before tiles go on; notch size is chosen by tile size. Work in sections so the adhesive does not skin over.
The light build is the reason to reach for this tool overhead. Overhead plastering is a repetitive wrist-loading task and a risk factor for musculoskeletal disorders, so plan the work in short sessions with breaks rather than one continuous push.
Use the hawk-and-trowel combination to keep material under control instead of reloading constantly. Bracing the free hand lightly against the ceiling steadies the body and takes some of the load off the working wrist.
Varying the blade angle and pressure across a fresh coat produces different surface patterns, and circular motions produce a stippled effect. Always test the pattern on a sample board or an inconspicuous area before committing to a wall.
Q1. Should I order carbon steel or stainless steel?
A. Each art number corresponds to one blade material; contact Leading Tools sales to confirm the material of 700010. As a guide, stainless suits users whose tool will not be dried and oiled after every use, if the site is humid, or if you are skimming gypsum onto pale finishes. Carbon steel suits users who will dry and oil the tool after every use.
Q2. Why are the blade corners square, and is that a defect?
A. No. The blade has square corners. Square corners can score parallel lines into wet material on a fine pass, so the usual fix is to round them slightly with sandpaper or an oil stone before use, which also lets you set the radius you prefer.
Q3. Can I use this trowel for tile adhesive?
A. For spreading, yes. For combing the adhesive to a controlled depth, no: that needs a notched trowel with a notch size matched to the tile. For that work, Leading Tools offers the German Standard Notched Trowel (702301-74 to -82).
Q4. My arm tires quickly on ceiling work.
A. Overhead plastering is repetitive, tiring work, so work in shorter sessions with breaks. Drive the stroke from the elbow rather than the wrist, use a hawk so you are not constantly returning to the bucket, and relax the grip, because over-gripping tires the hand faster than the work does.
Q5. How is this different from the DIY Trowel 611510?
A. Size. 611510 is the smaller imperial-sized DIY trowel (4-1/2" × 10-1/2"); 700010 is the wider metric 130 × 280 mm blade. Construction, material options and positioning are the same.
| Item | Detail |
|---|---|
| Product name | DIY Trowel |
| Article number | 700010 |
| Blade size | 130 mm × 280 mm (approx. 5-1/8" × 11", 1" = 25.4 mm) |
| Blade shape | Flat rectangle, unnotched |
| Blade corners | Square, not rounded |
| Construction | Spot Riveted, Light Weight |
| Blade material | Contact sales |
| Handle | One-piece molded plastic handle and spine, yellow |
| Note | Quality Consistent |
The blade is a flat rectangle with no teeth, so it spreads and levels material rather than combing it into ridges. Its job is the laying-on and leveling stage of a plaster or render coat, and light patching work.
The blade corners are square. Square corners can drag parallel score lines ("tramlines") through wet material at the edge of each pass, so for a fine closing finish, take the corners back with abrasive paper or an oil stone until they carry a small radius before the first job. For spreading, leveling and patching, the work this tool is aimed at; the square corners are not a problem and give a cleaner cut into internal angles.
A single molded plastic piece forms the bridge grip and the long mounting spine. The blade is Spot Riveted. The result is a light tool. The spine distributes hand pressure over most of the blade length rather than at a single mounting boss, which helps keep a light blade flat under load.
Each art number corresponds to one blade material; contact Leading Tools sales to confirm the material of 700010. The comparison below is for reference.
| Version | Handling character | Maintenance requirement | Best fit |
|---|---|---|---|
| Carbon Steel | Blade rusts if left damp | Must be wiped dry after every use and oiled periodically, or rust spotting appears; never leave it damp overnight | Dry-site repair work; users who will maintain the tool |
| Stainless Steel | Blade resists rust | High corrosion resistance and low maintenance; chlorinated water, coastal air or prolonged soaking can still cause rust spots, so rinse with clean water and dry after use | Humid sites, wet cleanup, gypsum skim coats, occasional and DIY users who will not oil a blade |
A light plastering trowel earns its place when the user does not plaster daily, when fatigue rather than coverage rate is the limiting factor, when the work is a series of small repairs rather than one large wall, and when overhead or ladder work makes tool control harder than tool speed.
Overhead plastering is a repetitive wrist-loading task and a risk factor for musculoskeletal disorders, which is the practical reason to work overhead in shorter sessions. The trade-off is real: a light blade feels less planted under sustained production work than a heavier professional finishing trowel.
| Situation | Recommendation |
|---|---|
| DIY / home renovation projects | Ideal: light, one tool covers spreading and leveling |
| Occasional or seasonal use | Good: easy to store; a stainless blade needs little upkeep |
| Small-area patching and repair | Suitable: the 130 mm width handles patches and reaches around obstructions |
| Ceiling and overhead patching | Suitable in short sessions: light build helps, but plan for breaks |
| Full-wall production plastering | Consider a larger, heavier professional trowel instead |
| High-gloss closing pass | Consider a finishing trowel with a chamfered edge |
| Combing tile adhesive | Use a notched trowel; notch size is set by tile size |
| Daily professional use | Consider a heavier professional trowel |
Two questions decide which blade material suits the job; confirm the material of 700010 with sales. First: will the tool be cleaned and dried after every single use? If not, stainless is the safer material: carbon steel that sits damp will spot with rust. Second: what material is being applied?
Gypsum skim coats on pale finishes are the classic case for stainless, because carbon steel can leave oxide marks. Carbon steel suits a user who will dry and oil the tool after every use.
Beginners should start at a middle size, around 11" or 13" (roughly 280–330 mm), rather than reaching for the largest blade, because a big blade is harder to keep flat and control. At 280 mm the 700010 sits at the bottom of that recommended entry band, which is consistent with its DIY positioning.
| Article | What it is | Choose it instead when |
|---|---|---|
| DIY Trowel 611510 | Smaller DIY trowel, 4-1/2" × 10-1/2" | The work is finer patching and the smaller imperial-sized blade is wanted |
| Finishing Trowel 690721 | Professional finishing trowel with soft-grip handle | The job needs a proper closing and polishing pass |
| German Standard Notched Trowel 702301-74 to -82 | Notched trowels for tile adhesive | Adhesive must be combed to a set bed depth |
This family has one article number.
| ART. Nr | Blade size | Blade size (imperial, 1" = 25.4 mm) | Blade material | Handle | Construction |
|---|---|---|---|---|---|
| 700010 | 130 mm × 280 mm | approx. 5-1/8" × 11" | Contact sales | One-piece molded plastic, yellow | Spot Riveted, Light Weight |
Note on total length: the 130 mm × 280 mm dimension is the blade face. It is the working dimension buyers compare across brands, and it is not an overall tool length.
| Material on the blade | Cleaning method |
|---|---|
| Wet plaster or mortar | Scrape off immediately, then wash with water and dry fully |
| Cured material | Soak in water to soften, then scrape; avoid gouging the blade face |
| Tile adhesive | Remove mechanically while still soft; avoid solvents on the plastic handle |
| General | Wash, dry completely, store dry |
Wipe the plastic handle with a damp cloth; do not use solvents. Avoid dropping the tool on hard floors, as molded plastic can crack at the spine. Check the handle-to-blade connection periodically and take the tool out of service if the spine has cracked or the handle has loosened from the blade.
A cracked spine or a loose handle-to-blade connection means the whole tool should be replaced.

In compliance with EU personal data protection laws, we are committed to protecting and providing you with control over your personal data. By clicking "Accept All", you allow us to place cookies to enhance your experience on this site, help us analyze site performance and usage, and enable us to deliver relevant marketing content. You can manage your cookie settings below. By clicking "Agree" you agree to the current settings. For more information, please visit the Privacy Statement.
This website uses cookies
In compliance with EU personal data protection laws, we are committed to protecting your personal data and providing you with control over it. By clicking "Agree", you allow us to place cookies to improve your experience on this site, help us analyze site performance and usage, and allow us to deliver relevant marketing content.
By clicking "Only necessary" you allow us to place only necessary cookies. The website cannot function without these cookies and you cannot switch them off on your system. These cookies are typically set only in response to an action you perform (i.e. a service request), such as setting privacy preferences, logging in, or filling in a form. You can set your browser to block or prompt you for these cookies, but this may prevent some site features from working.



