
Copyright 2026 © Leading Tools Industrial Co., Ltd.
All Rights Reserved. Website Design by Awakening Design
CATALOG TYPE
Product Categories
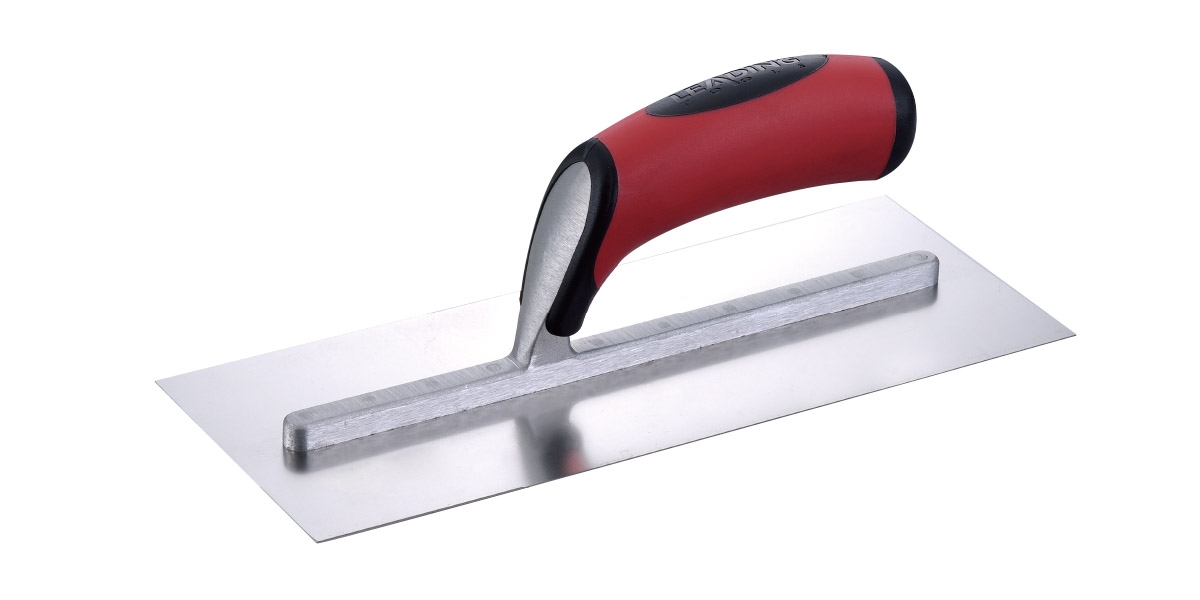
Premium Plaster Trowel — 4" Blade Width
Product Description
Product name: Premium Plaster Trowel
Art. Nr covered: 441821, 444821, 446821, 448821, the four 4" blade-width models of the Premium Plaster Trowel line
The Premium Plaster Trowel is a flat rectangular finishing trowel for gypsum plaster, skim coat, render and cement-based surface finishing. The same tool is also called a plastering trowel, finishing trowel or skimming trowel.
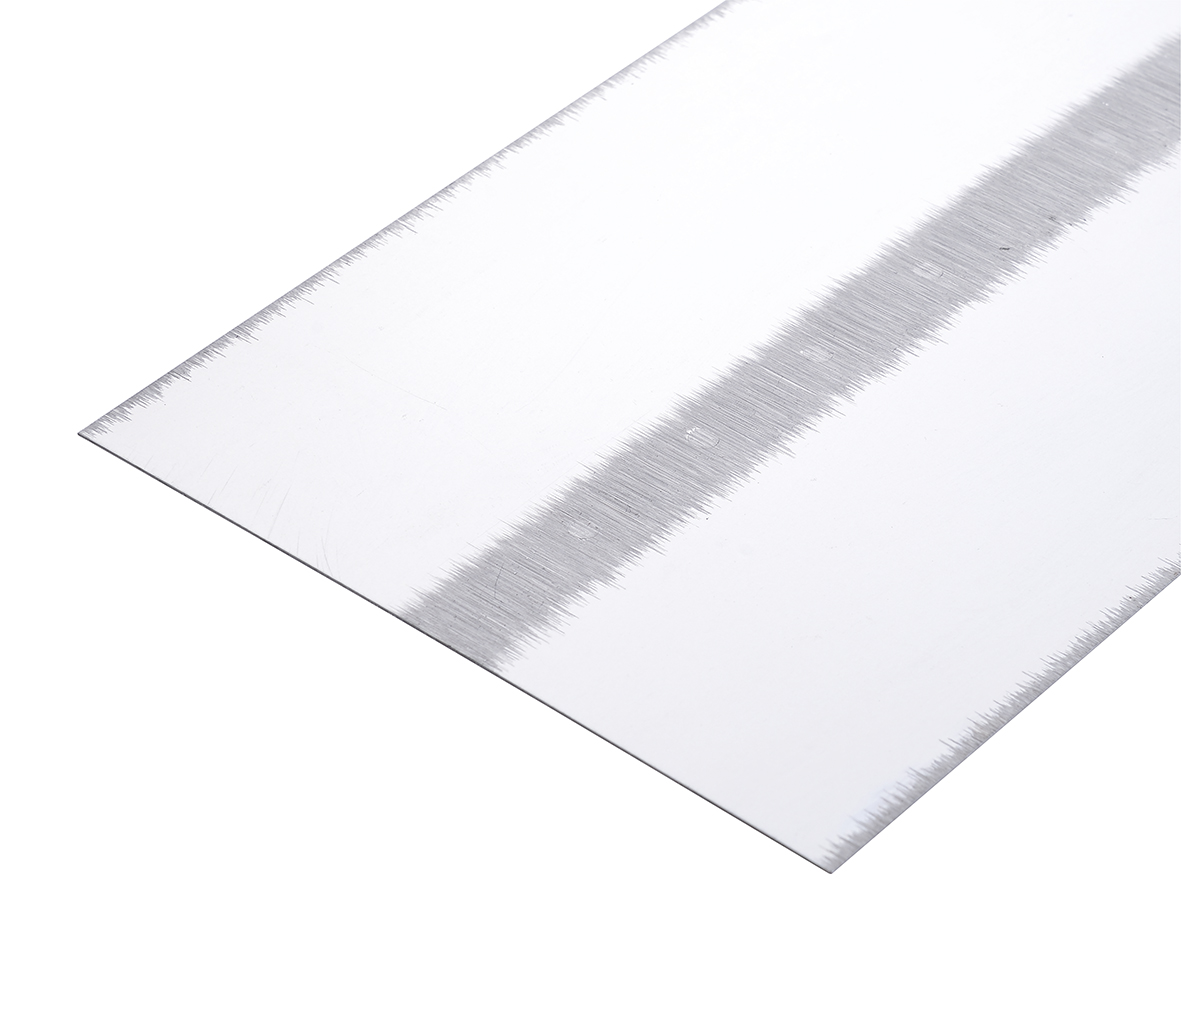
The Premium line is defined by three construction points: a riveted mount, a stainless steel blade on the listed art numbers (for carbon steel, contact sales), and a factory-prepared Pre-Worn Edge.
Within that line, the blade is offered in four widths (3", 4", 4-1/2", 4-3/4") across eleven to eighteen inch lengths. This page covers the 4" width only. Other widths (3", 4-1/2", 4-3/4"): see the Premium Plaster Trowel page. The 4" width is the narrow-to-standard finishing width: narrow enough for edge work, feathering and patch repair, wide enough to be used as a general wall finishing trowel.
| Feature | Detail |
|---|---|
| Blade width covered | 4" (102 mm) |
| Blade lengths available | 9-1/2", 14", 16", 18" (241 / 356 / 406 / 457 mm) |
| Blade material | Stainless steel; for carbon steel, contact sales |
| Mount construction | Mount riveted, blade and shank joined by rivets, not spot weld or adhesive |
| Edge preparation | Pre-Worn Edge, factory-prepared blade edge, supplied ready to use |
| Handle | Soft-grip handle on a raised shank |
| Handle clearance | Offset/cranked shank gives knuckle clearance so fingers clear the wet wall surface |
On the edge preparation. New trowels with sharp square corners cut "tramline" scratches into fresh plaster, so the corners must be rounded with fine abrasive before first use. The Pre-Worn Edge removes that break-in step and lets the tool be used on finish work straight out of the box.
A finishing width that still handles edges. At 4" the blade carries enough material for continuous wall passes but is narrow enough to feather a repair into an existing surface without the outer corner riding off the work. Wider 4-1/2" and 4-3/4" blades cover ground faster but are harder to control at edges and reveals.
Four lengths off one width. Because all four art numbers share the 4" width, a crew can standardize on one blade width and vary only the length by task: 9-1/2" for ceiling lines and cornice edges, 14" for general walls, 16"–18" for long continuous passes. The grip and edge preparation stay the same across the four, so a finisher's feel for the tool transfers between sizes.
Stainless blade on every listed art number. Stainless steel has high corrosion resistance and low maintenance and will not stain a white finish; chlorinated water, coastal air or prolonged soaking can still cause rust spots, so rinse with clean water and dry after use. Each art number corresponds to one blade material. Carbon steel blades cost less, but must be wiped dry and given a thin coat of tool oil after use, or they will rust; for a carbon steel blade, contact Leading Tools sales.
Riveted mount. The riveted blade-to-shank joint is a mechanical fixing that can be inspected visually and does not rely on adhesive bond strength.
Prepared edge, no break-in. A trowel with square factory corners will scratch the first wall it touches; a prepared edge removes that risk on day one and removes the need to teach new hires the abrasive break-in step.
Knuckle clearance. The raised, offset shank keeps the hand off the wet surface during vertical wall passes.
| Situation | Recommended Model | Why |
|---|---|---|
| Skim coat / finish coat on plasterboard walls | 444821 (4" × 14") | General-purpose finishing size |
| Ceiling perimeter, cornice line, above-shoulder work | 441821 (4" × 9-1/2") | One size down from the wall trowel reduces wrist and shoulder load |
| Patch repair feathered into an existing surface | 441821 (4" × 9-1/2") | Short blade follows the existing plane instead of bridging it |
| Long corridor or open commercial wall | 446821 / 448821 (4" × 16" / 18") | Fewer joins per wall; requires an experienced hand |
| Cement render surface finishing | 444821 or 446821 | Stainless resists corrosion from wet cement between uses |
| White gypsum finish where staining matters | Any length (all listed art numbers are stainless) | Carbon steel can leave oxide marks on white finishes |
| Learning the tool / apprentice first trowel | 441821 (4" × 9-1/2") | A short blade is easier for beginners to keep flat |
| Tile adhesive or filler smoothing (secondary use) | 444821 | Same flat-blade action; a secondary application, not the design intent |
The five-pass skim sequence follows one principle: the blade angle gets flatter as the work approaches finished.
| Step | Pass | Blade Angle | What You Are Doing |
|---|---|---|---|
| 1 | Laying on (first coat) | approx. 30° | Load material onto the wall. Steeper angle pushes material off the blade onto the surface |
| 2 | Flattening | approx. 15° | Flatten and level the first coat. The angle drops as the surface closes |
| 3 | Second coat | approx. 30° | Lay on a thinner second coat over the flattened first |
| 4 | Second flattening | approx. 15° | Level the second coat |
| 5 | Wet trowel, then dry polish | near-flat, near-zero pressure | Mist the surface or the blade, close the surface, then a final dry pass to polish |
Supporting technique notes:
| Mistake | Result | Fix |
|---|---|---|
| Using a brand-new trowel with square corners | "Tramline" straight scratch marks in the finish | Round the corners with fine abrasive (approx. 400 grit), or use a factory-prepared edge |
| Over-working the surface | Tearing, drag marks, dead patches | Fewer passes, correct timing, even pressure |
| Uneven pass overlap | Visible bands across the wall | Overlap each pass by about half the blade width and keep pass speed constant |
Use 441821 (4" × 9-1/2"). Working above shoulder height loads the wrist and shoulder continuously, so drop one size from your wall trowel. Work the perimeter band first with the short blade, then bring the wall trowel up to meet it, feathering the join. The short blade lets you follow a cornice profile without the far corner of a longer blade catching the moulding.
Use 446821 or 448821 (4" × 16" or 18"). Longer blades reduce the number of joins across a long wall, which is where banding shows under grazing corridor lighting. The trade-off is real: an 18" blade telegraphs any pressure inconsistency along its full length, so it is a size for experienced finishers only. Keep the five-pass sequence and do not shorten it to save time on large areas.
Use 441821 (4" × 9-1/2"). A short blade follows the existing surface plane; a long blade bridges from the old surface to the patch and will build a proud edge. Feather outward from the patch with progressively lighter pressure, finishing with the near-flat wet-and-dry polish pass.
Lime finishes need longer working times and more finish passes than gypsum, so sessions run long. The listed stainless blades suit this work: lime is caustic and a carbon steel blade stored wet between passes will corrode. A properly prepared blade edge matters more here than on gypsum, because lime finishes are usually left exposed and every tramline shows.
Q: Which size should I order first if I only order one?
A: 444821 (4" × 14"). Fourteen inches is a common general-purpose finishing size, and 4" is easy enough to control for both wall work and edges.
Q: Carbon steel or stainless steel, which should I buy?
A: The art numbers on this page are stainless steel, the low-maintenance choice that will not stain white gypsum finishes. Each art number corresponds to one blade material. If your finishers will dry and oil the blade after every use and you need carbon steel, contact Leading Tools sales.
Q: Do I need to break in a new trowel before using it on finish work?
A: New trowels with square factory corners need the corners rounded with fine sandpaper, or they will scratch lines into the finish. This product has a factory-prepared edge, so that step should not be needed. Confirm with a test pass on a scrap area first.
Q: My wrist aches after a day of ceiling work. What can I change?
A: Drop one blade size for overhead work, keep the wrist straight instead of sharply bent, and rotate tasks through the day. Sizing and technique reduce this load; no flat trowel shape removes it.
Q: How do I stop a carbon steel blade from rusting?
A: Wash off the material before it sets, dry the blade completely and apply a light film of machine oil after every use. Store it dry.
| Property | Detail |
|---|---|
| Blade width | 4" (102 mm) |
| Blade lengths | 9-1/2", 14", 16", 18" |
| Blade material | Stainless steel |
| Blade profile | Flat rectangular, square corners with prepared edge |
| Edge preparation | Pre-Worn Edge (factory-prepared) |
| Property | Detail |
|---|---|
| Handle type | Soft-grip handle |
| Mount | Mount riveted, rigid mechanical fixing to the shank |
| Shank | Raised/offset shank providing knuckle clearance |
Weight rises with blade length across the four models; buyers working overhead or from scaffolding should size down for that reason rather than for coverage.
| Art. Nr | Blade Size | Primary Use |
|---|---|---|
| 441821 | 4" × 9-1/2" | Ceiling lines, cornice edges, reveals, patch repairs, confined areas. Also suited to learning, since a short blade is easier to keep flat |
| 444821 | 4" × 14" | General wall finishing. 14" is a common general-purpose size for walls |
| 446821 | 4" × 16" | Longer continuous passes on open wall areas; fewer joins per wall, more forearm load per pass |
| 448821 | 4" × 18" | Large uninterrupted areas: corridors, commercial walls. Requires an experienced finisher; the blade will telegraph any inconsistency in pressure across its length |
Rule of thumb for overhead and high work: drop one size from your wall size. If you finish walls with the 14", use the 9-1/2" for ceiling perimeter and above-shoulder work, to reduce wrist and shoulder load.
The art numbers on this page are stainless steel. Each art number corresponds to one blade material; for a carbon steel blade, contact Leading Tools sales. The comparison below is for reference.
| Carbon Steel | Stainless Steel | |
|---|---|---|
| Corrosion | Rusts; must be dried and oiled after each use | High corrosion resistance, low maintenance; rinse and wipe dry after use |
| White gypsum finishes | Can leave oxide marks | No staining |
| Daily maintenance | Higher | Minimal |
| Best for | Dry sites, crews with a maintenance routine | Wet trades, site conditions, hire fleets, white finish work |
| Art. Nr | Blade Size (Width × Length) | Metric | Blade Material | Handle |
|---|---|---|---|---|
| 441821 | 4" × 9-1/2" | 102 × 241 mm | Stainless steel | Soft-grip, mount riveted |
| 444821 | 4" × 14" | 102 × 356 mm | Stainless steel | Soft-grip, mount riveted |
| 446821 | 4" × 16" | 102 × 406 mm | Stainless steel | Soft-grip, mount riveted |
| 448821 | 4" × 18" | 102 × 457 mm | Stainless steel | Soft-grip, mount riveted |
Metric conversions calculated at 1" = 25.4 mm.
Other widths (3", 4-1/2", 4-3/4"): see the Premium Plaster Trowel page.
Product name: Premium Plaster Trowel
Art. Nr covered: 441821, 444821, 446821, 448821, the four 4" blade-width models of the Premium Plaster Trowel line
The Premium Plaster Trowel is a flat rectangular finishing trowel for gypsum plaster, skim coat, render and cement-based surface finishing. The same tool is also called a plastering trowel, finishing trowel or skimming trowel.
The Premium line is defined by three construction points: a riveted mount, a stainless steel blade on the listed art numbers (for carbon steel, contact sales), and a factory-prepared Pre-Worn Edge.
Within that line, the blade is offered in four widths (3", 4", 4-1/2", 4-3/4") across eleven to eighteen inch lengths. This page covers the 4" width only. Other widths (3", 4-1/2", 4-3/4"): see the Premium Plaster Trowel page. The 4" width is the narrow-to-standard finishing width: narrow enough for edge work, feathering and patch repair, wide enough to be used as a general wall finishing trowel.
| Feature | Detail |
|---|---|
| Blade width covered | 4" (102 mm) |
| Blade lengths available | 9-1/2", 14", 16", 18" (241 / 356 / 406 / 457 mm) |
| Blade material | Stainless steel; for carbon steel, contact sales |
| Mount construction | Mount riveted, blade and shank joined by rivets, not spot weld or adhesive |
| Edge preparation | Pre-Worn Edge, factory-prepared blade edge, supplied ready to use |
| Handle | Soft-grip handle on a raised shank |
| Handle clearance | Offset/cranked shank gives knuckle clearance so fingers clear the wet wall surface |
On the edge preparation. New trowels with sharp square corners cut "tramline" scratches into fresh plaster, so the corners must be rounded with fine abrasive before first use. The Pre-Worn Edge removes that break-in step and lets the tool be used on finish work straight out of the box.
A finishing width that still handles edges. At 4" the blade carries enough material for continuous wall passes but is narrow enough to feather a repair into an existing surface without the outer corner riding off the work. Wider 4-1/2" and 4-3/4" blades cover ground faster but are harder to control at edges and reveals.
Four lengths off one width. Because all four art numbers share the 4" width, a crew can standardize on one blade width and vary only the length by task: 9-1/2" for ceiling lines and cornice edges, 14" for general walls, 16"–18" for long continuous passes. The grip and edge preparation stay the same across the four, so a finisher's feel for the tool transfers between sizes.
Stainless blade on every listed art number. Stainless steel has high corrosion resistance and low maintenance and will not stain a white finish; chlorinated water, coastal air or prolonged soaking can still cause rust spots, so rinse with clean water and dry after use. Each art number corresponds to one blade material. Carbon steel blades cost less, but must be wiped dry and given a thin coat of tool oil after use, or they will rust; for a carbon steel blade, contact Leading Tools sales.
Riveted mount. The riveted blade-to-shank joint is a mechanical fixing that can be inspected visually and does not rely on adhesive bond strength.
Prepared edge, no break-in. A trowel with square factory corners will scratch the first wall it touches; a prepared edge removes that risk on day one and removes the need to teach new hires the abrasive break-in step.
Knuckle clearance. The raised, offset shank keeps the hand off the wet surface during vertical wall passes.
| Situation | Recommended Model | Why |
|---|---|---|
| Skim coat / finish coat on plasterboard walls | 444821 (4" × 14") | General-purpose finishing size |
| Ceiling perimeter, cornice line, above-shoulder work | 441821 (4" × 9-1/2") | One size down from the wall trowel reduces wrist and shoulder load |
| Patch repair feathered into an existing surface | 441821 (4" × 9-1/2") | Short blade follows the existing plane instead of bridging it |
| Long corridor or open commercial wall | 446821 / 448821 (4" × 16" / 18") | Fewer joins per wall; requires an experienced hand |
| Cement render surface finishing | 444821 or 446821 | Stainless resists corrosion from wet cement between uses |
| White gypsum finish where staining matters | Any length (all listed art numbers are stainless) | Carbon steel can leave oxide marks on white finishes |
| Learning the tool / apprentice first trowel | 441821 (4" × 9-1/2") | A short blade is easier for beginners to keep flat |
| Tile adhesive or filler smoothing (secondary use) | 444821 | Same flat-blade action; a secondary application, not the design intent |
The five-pass skim sequence follows one principle: the blade angle gets flatter as the work approaches finished.
| Step | Pass | Blade Angle | What You Are Doing |
|---|---|---|---|
| 1 | Laying on (first coat) | approx. 30° | Load material onto the wall. Steeper angle pushes material off the blade onto the surface |
| 2 | Flattening | approx. 15° | Flatten and level the first coat. The angle drops as the surface closes |
| 3 | Second coat | approx. 30° | Lay on a thinner second coat over the flattened first |
| 4 | Second flattening | approx. 15° | Level the second coat |
| 5 | Wet trowel, then dry polish | near-flat, near-zero pressure | Mist the surface or the blade, close the surface, then a final dry pass to polish |
Supporting technique notes:
| Mistake | Result | Fix |
|---|---|---|
| Using a brand-new trowel with square corners | "Tramline" straight scratch marks in the finish | Round the corners with fine abrasive (approx. 400 grit), or use a factory-prepared edge |
| Over-working the surface | Tearing, drag marks, dead patches | Fewer passes, correct timing, even pressure |
| Uneven pass overlap | Visible bands across the wall | Overlap each pass by about half the blade width and keep pass speed constant |
Use 441821 (4" × 9-1/2"). Working above shoulder height loads the wrist and shoulder continuously, so drop one size from your wall trowel. Work the perimeter band first with the short blade, then bring the wall trowel up to meet it, feathering the join. The short blade lets you follow a cornice profile without the far corner of a longer blade catching the moulding.
Use 446821 or 448821 (4" × 16" or 18"). Longer blades reduce the number of joins across a long wall, which is where banding shows under grazing corridor lighting. The trade-off is real: an 18" blade telegraphs any pressure inconsistency along its full length, so it is a size for experienced finishers only. Keep the five-pass sequence and do not shorten it to save time on large areas.
Use 441821 (4" × 9-1/2"). A short blade follows the existing surface plane; a long blade bridges from the old surface to the patch and will build a proud edge. Feather outward from the patch with progressively lighter pressure, finishing with the near-flat wet-and-dry polish pass.
Lime finishes need longer working times and more finish passes than gypsum, so sessions run long. The listed stainless blades suit this work: lime is caustic and a carbon steel blade stored wet between passes will corrode. A properly prepared blade edge matters more here than on gypsum, because lime finishes are usually left exposed and every tramline shows.
Q: Which size should I order first if I only order one?
A: 444821 (4" × 14"). Fourteen inches is a common general-purpose finishing size, and 4" is easy enough to control for both wall work and edges.
Q: Carbon steel or stainless steel, which should I buy?
A: The art numbers on this page are stainless steel, the low-maintenance choice that will not stain white gypsum finishes. Each art number corresponds to one blade material. If your finishers will dry and oil the blade after every use and you need carbon steel, contact Leading Tools sales.
Q: Do I need to break in a new trowel before using it on finish work?
A: New trowels with square factory corners need the corners rounded with fine sandpaper, or they will scratch lines into the finish. This product has a factory-prepared edge, so that step should not be needed. Confirm with a test pass on a scrap area first.
Q: My wrist aches after a day of ceiling work. What can I change?
A: Drop one blade size for overhead work, keep the wrist straight instead of sharply bent, and rotate tasks through the day. Sizing and technique reduce this load; no flat trowel shape removes it.
Q: How do I stop a carbon steel blade from rusting?
A: Wash off the material before it sets, dry the blade completely and apply a light film of machine oil after every use. Store it dry.
| Property | Detail |
|---|---|
| Blade width | 4" (102 mm) |
| Blade lengths | 9-1/2", 14", 16", 18" |
| Blade material | Stainless steel |
| Blade profile | Flat rectangular, square corners with prepared edge |
| Edge preparation | Pre-Worn Edge (factory-prepared) |
| Property | Detail |
|---|---|
| Handle type | Soft-grip handle |
| Mount | Mount riveted, rigid mechanical fixing to the shank |
| Shank | Raised/offset shank providing knuckle clearance |
Weight rises with blade length across the four models; buyers working overhead or from scaffolding should size down for that reason rather than for coverage.
| Art. Nr | Blade Size | Primary Use |
|---|---|---|
| 441821 | 4" × 9-1/2" | Ceiling lines, cornice edges, reveals, patch repairs, confined areas. Also suited to learning, since a short blade is easier to keep flat |
| 444821 | 4" × 14" | General wall finishing. 14" is a common general-purpose size for walls |
| 446821 | 4" × 16" | Longer continuous passes on open wall areas; fewer joins per wall, more forearm load per pass |
| 448821 | 4" × 18" | Large uninterrupted areas: corridors, commercial walls. Requires an experienced finisher; the blade will telegraph any inconsistency in pressure across its length |
Rule of thumb for overhead and high work: drop one size from your wall size. If you finish walls with the 14", use the 9-1/2" for ceiling perimeter and above-shoulder work, to reduce wrist and shoulder load.
The art numbers on this page are stainless steel. Each art number corresponds to one blade material; for a carbon steel blade, contact Leading Tools sales. The comparison below is for reference.
| Carbon Steel | Stainless Steel | |
|---|---|---|
| Corrosion | Rusts; must be dried and oiled after each use | High corrosion resistance, low maintenance; rinse and wipe dry after use |
| White gypsum finishes | Can leave oxide marks | No staining |
| Daily maintenance | Higher | Minimal |
| Best for | Dry sites, crews with a maintenance routine | Wet trades, site conditions, hire fleets, white finish work |
| Art. Nr | Blade Size (Width × Length) | Metric | Blade Material | Handle |
|---|---|---|---|---|
| 441821 | 4" × 9-1/2" | 102 × 241 mm | Stainless steel | Soft-grip, mount riveted |
| 444821 | 4" × 14" | 102 × 356 mm | Stainless steel | Soft-grip, mount riveted |
| 446821 | 4" × 16" | 102 × 406 mm | Stainless steel | Soft-grip, mount riveted |
| 448821 | 4" × 18" | 102 × 457 mm | Stainless steel | Soft-grip, mount riveted |
Metric conversions calculated at 1" = 25.4 mm.
Other widths (3", 4-1/2", 4-3/4"): see the Premium Plaster Trowel page.

In compliance with EU personal data protection laws, we are committed to protecting and providing you with control over your personal data. By clicking "Accept All", you allow us to place cookies to enhance your experience on this site, help us analyze site performance and usage, and enable us to deliver relevant marketing content. You can manage your cookie settings below. By clicking "Agree" you agree to the current settings. For more information, please visit the Privacy Statement.
This website uses cookies
In compliance with EU personal data protection laws, we are committed to protecting your personal data and providing you with control over it. By clicking "Agree", you allow us to place cookies to improve your experience on this site, help us analyze site performance and usage, and allow us to deliver relevant marketing content.
By clicking "Only necessary" you allow us to place only necessary cookies. The website cannot function without these cookies and you cannot switch them off on your system. These cookies are typically set only in response to an action you perform (i.e. a service request), such as setting privacy preferences, logging in, or filling in a form. You can set your browser to block or prompt you for these cookies, but this may prevent some site features from working.



