
Copyright 2026 © Leading Tools Industrial Co., Ltd.
All Rights Reserved. Website Design by Awakening Design
CATALOG TYPE
Product Categories
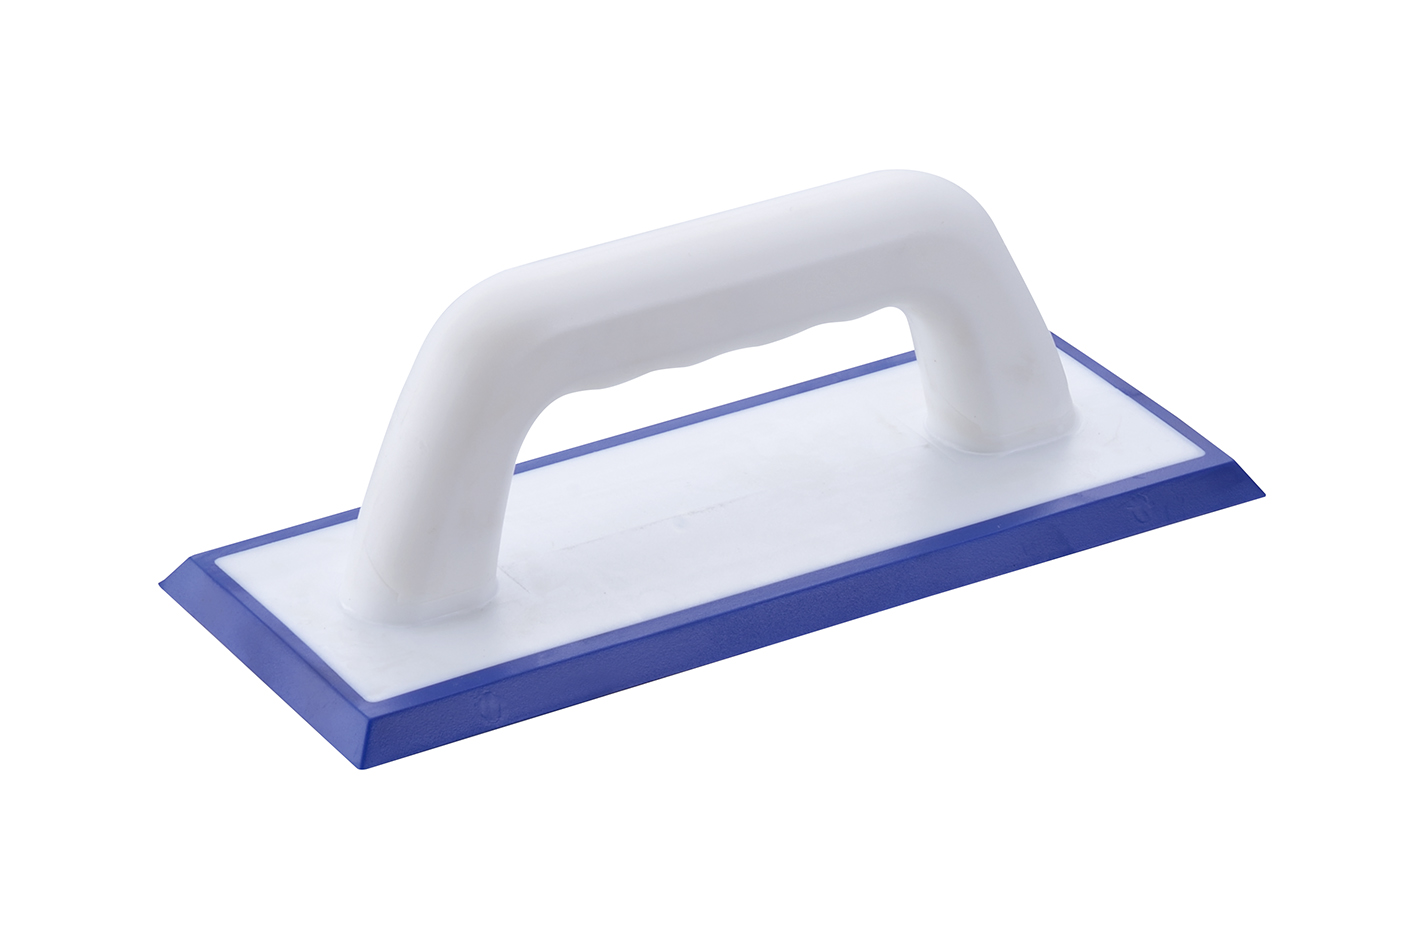
Rubber Grout Float
Product Description
| Item | Detail |
|---|---|
| Product name | Rubber Grout Float |
| Article number | 611701 |
| Product family | Float |
| Size | 95 mm × 245 mm |
| Working face | Blue rubber face |
| Handle | White arched (bridge) handle |
The 611701 is a rubber grout float, the hand tool a tile setter uses after the tile adhesive has cured, to press grout into the joints between tiles and then strike the excess off the tile faces. Everything about it: the soft rubber face and the bridge handle, exists so that grout goes into the joint and nothing scratches the tile on the way.
| Advantage | What it means on the job | Who benefits most |
|---|---|---|
| Soft rubber face | Grout gets compacted into the joint while glazed, polished porcelain and stone tile faces come through unmarked | Tile setters working on polished porcelain, glass mosaic and natural stone |
| Bridge handle with clear knuckle space | The arch gives room to keep a full-hand grip while driving the pad hard against the wall at 45°, which is the grip position the compaction step actually requires | Anyone doing the press-in pass rather than just wiping |
Where it is not the right tool. For large open floors, choose a larger float or contact us. Deep under-cabinet toe-kicks and low skirting runs are easier with an offset-handle / toe-kick float, where the handle is raised off the pad plane.
And this is not a sponge float: final washing off of the grout haze is done with a wet sponge or a sponge float, not with a rubber grout float. In the Leading Tools range the companion tools for those jobs are the Sponge Float 611686 (130 × 305 mm) and the Hook-and-Loop Sponge Float 611685 (130 × 270 mm).
| Situation | Use the 611701? | Why |
|---|---|---|
| Tile adhesive fully cured (per the adhesive manufacturer's data sheet), joints cleaned out, ready to grout | Yes | This is the tool's job: press grout in and strike the excess off |
| Cementitious grout, wall or floor, small to medium field | Yes | Standard application for a rubber grout float |
| Glass mosaic, polished porcelain, natural stone | Yes | The rubber face is gentler on the surface than a metal edge |
| Removing grout haze after the grout has stiffened | No | Use a damp sponge or sponge float; a rubber float will drag the joints out |
| Adhesive is not yet fully cured | No | Grouting over uncured adhesive traps moisture and disturbs the tile |
| Applying tile adhesive | No | Adhesive is applied with a notched trowel; this tool has no notches |
| Step | Action | Detail |
|---|---|---|
| 1 | Mix the grout | Mix to the manufacturer's ratio to a consistency often described as peanut butter: stiff enough to hold shape, wet enough to flow into the joint |
| 2 | Load the pad | Take grout onto the pad and start at a corner of the work area; plan for one small section at a time |
| 3 | Press it in, 45° | Hold the float at roughly 45° to the tile and push, working diagonally across the joints. Never run the pad parallel to a joint, or it will pull the grout back out |
| 4 | Fill in both directions | Make a second diagonal pass at the opposite angle so every joint is filled and compacted from both sides |
| 5 | Strike off, 80–90° | Stand the float up to about 80–90° and sweep, still diagonally, to shear the excess grout off the tile faces without lifting it out of the joints |
| 6 | Work in small sections | Roughly a 3 × 3 tile area at a time so that grout does not dry on the tile before you get back to clean it |
| 7 | Clean the pad as you go | Rinse hardened grout off the face during work; a hard crumb bonded to the rubber will scratch the next tile |
| 8 | Wait, then sponge | Let the grout stiffen as the grout manufacturer instructs, then do the final clean-off with a damp sponge, not with the float |
The method has two phases, always in the same order: diagonal press-in first, then diagonal strike-off.
Grout falls off vertical joints if it is not compacted, so the 45° press-in pass has to be firm, and the arched handle lets you push straight into the wall instead of just smearing along it. Grout the field first, then come back to the corners, edges and trim junctions. Keep the section small so the grout does not dry before you clean it.
Whether the rubber face of the 611701 suits epoxy grout: please contact us. If epoxy grout is used, clean the tool before the epoxy gels; once cured, it does not come off.
Mosaic sheets have several times the joint length per square meter of a large-format tile, so almost all the work is compaction rather than coverage. Work in short diagonal strokes, and expect to spend more time on the fill passes and less on the strike-off than you would on plain field tile.
For raking out and re-grouting a failed section, match the new grout to the existing joint width using the sanded / unsanded rule, fill diagonally, strike off diagonally, and keep the pad off the surrounding sound grout so you do not disturb joints that are doing their job.
Q: How do I use it?
A: Pass diagonally across the joints, because a pass running parallel to a joint lets the pad edge drop in and drag the grout back out. Hold it at about 45° to press the grout in, then stand it up to about 80–90° to shear off the excess. Work roughly a 3 × 3 tile section at a time, then wash off the haze with a damp sponge, not the float, once the grout has stiffened as the grout manufacturer instructs.
Q: Grout keeps coming back out of the joints. What am I doing wrong?
A: Almost always one of three things: passing parallel to the joints instead of diagonally, striking off at too shallow an angle, or grout mixed too wet. Fix the direction first.
Q: Will it scratch polished porcelain or natural stone?
A: A clean rubber face will not, which is why the tool is rubber-faced instead of metal-backed. What does scratch tile is hardened grout stuck to the pad, so rinse the face as you work and check the pad edge for cracking or embedded grit before each use. For epoxy grout, please contact us about compatibility.
Q: Can I use it to spread tile adhesive?
A: No. Adhesive is combed on with a notched trowel so the ribs collapse to a controlled bed thickness, and a flat rubber pad cannot do that. Its designed and primary application is tile grouting.
| Item | Detail |
|---|---|
| Product name | Rubber Grout Float |
| Article number | 611701 |
| Size | 95 mm × 245 mm (approx. 3-3/4" × 9-5/8"; 1" = 25.4 mm) |
| Working face material | Rubber |
| Product family | Float |
| Working face | Blue rubber pad |
| Handle | White arched bridge type |
The working surface is a rubber pad, and its two jobs pull in opposite directions. It must be firm enough to build the pressure that drives grout down into a joint rather than skating over it, and soft enough that the same pass does not abrade the tile glaze.
Face flatness matters as much as hardness: any hardened grout left bonded to the pad becomes a hard ridge that drags a line across the next tile, which is why in-progress cleaning is a technique step and not just housekeeping.
The handle is a white arch above the pad. An arched bridge handle is what allows the hand to sit centered over the pad and push perpendicular into the wall, the grip geometry that the 45° compaction pass depends on.
| Leading Tools item | Art. Nr | Size | What it is for |
|---|---|---|---|
| Rubber Grout Float | 611701 | 95 × 245 mm | Pressing grout into tile joints and striking off the excess |
| Aluminum Hand Sander | 301090 | 80 × 235 mm | Abrasive-backed hand sanding of set surfaces |
| Hook-and-Loop Sponge Float | 611685 | 130 × 270 mm | Holding a hook-and-loop sponge pad for washing down |
| Sponge Float | 611686 | 130 × 305 mm | Sponge finishing and final haze removal |
| Attribute | 611701 (95 × 245 mm) | Common full-size alternatives |
|---|---|---|
| Pad size | 95 × 245 mm (approx. 3-3/4" × 9-5/8") | 9" × 4" (229 × 102 mm) is a common size |
| Handle | Fixed arched bridge, in-plane | Also sold with offset / toe-kick handles for low and recessed access |
| Joint width | Grout to specify | Note |
|---|---|---|
| ≥ 1/8" (about 3 mm) | Sanded grout | Sand gives the wider joint its strength |
| < 1/8" (about 3 mm) | Unsanded grout | Sanded grout will not compact cleanly into narrow joints |
| Any width, chemical or stain resistance required | Epoxy grout | Compatibility of the rubber face with epoxy grout: please contact us |
Complete art-number and size reference for the Leading Tools Rubber Grout Float.
| Art. Nr | Size | Working face | Handle |
|---|---|---|---|
| 611701 | 95 mm × 245 mm | Blue rubber pad | White arched bridge handle |
| Item | Detail |
|---|---|
| Product name | Rubber Grout Float |
| Article number | 611701 |
| Product family | Float |
| Size | 95 mm × 245 mm |
| Working face | Blue rubber face |
| Handle | White arched (bridge) handle |
The 611701 is a rubber grout float, the hand tool a tile setter uses after the tile adhesive has cured, to press grout into the joints between tiles and then strike the excess off the tile faces. Everything about it: the soft rubber face and the bridge handle, exists so that grout goes into the joint and nothing scratches the tile on the way.
| Advantage | What it means on the job | Who benefits most |
|---|---|---|
| Soft rubber face | Grout gets compacted into the joint while glazed, polished porcelain and stone tile faces come through unmarked | Tile setters working on polished porcelain, glass mosaic and natural stone |
| Bridge handle with clear knuckle space | The arch gives room to keep a full-hand grip while driving the pad hard against the wall at 45°, which is the grip position the compaction step actually requires | Anyone doing the press-in pass rather than just wiping |
Where it is not the right tool. For large open floors, choose a larger float or contact us. Deep under-cabinet toe-kicks and low skirting runs are easier with an offset-handle / toe-kick float, where the handle is raised off the pad plane.
And this is not a sponge float: final washing off of the grout haze is done with a wet sponge or a sponge float, not with a rubber grout float. In the Leading Tools range the companion tools for those jobs are the Sponge Float 611686 (130 × 305 mm) and the Hook-and-Loop Sponge Float 611685 (130 × 270 mm).
| Situation | Use the 611701? | Why |
|---|---|---|
| Tile adhesive fully cured (per the adhesive manufacturer's data sheet), joints cleaned out, ready to grout | Yes | This is the tool's job: press grout in and strike the excess off |
| Cementitious grout, wall or floor, small to medium field | Yes | Standard application for a rubber grout float |
| Glass mosaic, polished porcelain, natural stone | Yes | The rubber face is gentler on the surface than a metal edge |
| Removing grout haze after the grout has stiffened | No | Use a damp sponge or sponge float; a rubber float will drag the joints out |
| Adhesive is not yet fully cured | No | Grouting over uncured adhesive traps moisture and disturbs the tile |
| Applying tile adhesive | No | Adhesive is applied with a notched trowel; this tool has no notches |
| Step | Action | Detail |
|---|---|---|
| 1 | Mix the grout | Mix to the manufacturer's ratio to a consistency often described as peanut butter: stiff enough to hold shape, wet enough to flow into the joint |
| 2 | Load the pad | Take grout onto the pad and start at a corner of the work area; plan for one small section at a time |
| 3 | Press it in, 45° | Hold the float at roughly 45° to the tile and push, working diagonally across the joints. Never run the pad parallel to a joint, or it will pull the grout back out |
| 4 | Fill in both directions | Make a second diagonal pass at the opposite angle so every joint is filled and compacted from both sides |
| 5 | Strike off, 80–90° | Stand the float up to about 80–90° and sweep, still diagonally, to shear the excess grout off the tile faces without lifting it out of the joints |
| 6 | Work in small sections | Roughly a 3 × 3 tile area at a time so that grout does not dry on the tile before you get back to clean it |
| 7 | Clean the pad as you go | Rinse hardened grout off the face during work; a hard crumb bonded to the rubber will scratch the next tile |
| 8 | Wait, then sponge | Let the grout stiffen as the grout manufacturer instructs, then do the final clean-off with a damp sponge, not with the float |
The method has two phases, always in the same order: diagonal press-in first, then diagonal strike-off.
Grout falls off vertical joints if it is not compacted, so the 45° press-in pass has to be firm, and the arched handle lets you push straight into the wall instead of just smearing along it. Grout the field first, then come back to the corners, edges and trim junctions. Keep the section small so the grout does not dry before you clean it.
Whether the rubber face of the 611701 suits epoxy grout: please contact us. If epoxy grout is used, clean the tool before the epoxy gels; once cured, it does not come off.
Mosaic sheets have several times the joint length per square meter of a large-format tile, so almost all the work is compaction rather than coverage. Work in short diagonal strokes, and expect to spend more time on the fill passes and less on the strike-off than you would on plain field tile.
For raking out and re-grouting a failed section, match the new grout to the existing joint width using the sanded / unsanded rule, fill diagonally, strike off diagonally, and keep the pad off the surrounding sound grout so you do not disturb joints that are doing their job.
Q: How do I use it?
A: Pass diagonally across the joints, because a pass running parallel to a joint lets the pad edge drop in and drag the grout back out. Hold it at about 45° to press the grout in, then stand it up to about 80–90° to shear off the excess. Work roughly a 3 × 3 tile section at a time, then wash off the haze with a damp sponge, not the float, once the grout has stiffened as the grout manufacturer instructs.
Q: Grout keeps coming back out of the joints. What am I doing wrong?
A: Almost always one of three things: passing parallel to the joints instead of diagonally, striking off at too shallow an angle, or grout mixed too wet. Fix the direction first.
Q: Will it scratch polished porcelain or natural stone?
A: A clean rubber face will not, which is why the tool is rubber-faced instead of metal-backed. What does scratch tile is hardened grout stuck to the pad, so rinse the face as you work and check the pad edge for cracking or embedded grit before each use. For epoxy grout, please contact us about compatibility.
Q: Can I use it to spread tile adhesive?
A: No. Adhesive is combed on with a notched trowel so the ribs collapse to a controlled bed thickness, and a flat rubber pad cannot do that. Its designed and primary application is tile grouting.
| Item | Detail |
|---|---|
| Product name | Rubber Grout Float |
| Article number | 611701 |
| Size | 95 mm × 245 mm (approx. 3-3/4" × 9-5/8"; 1" = 25.4 mm) |
| Working face material | Rubber |
| Product family | Float |
| Working face | Blue rubber pad |
| Handle | White arched bridge type |
The working surface is a rubber pad, and its two jobs pull in opposite directions. It must be firm enough to build the pressure that drives grout down into a joint rather than skating over it, and soft enough that the same pass does not abrade the tile glaze.
Face flatness matters as much as hardness: any hardened grout left bonded to the pad becomes a hard ridge that drags a line across the next tile, which is why in-progress cleaning is a technique step and not just housekeeping.
The handle is a white arch above the pad. An arched bridge handle is what allows the hand to sit centered over the pad and push perpendicular into the wall, the grip geometry that the 45° compaction pass depends on.
| Leading Tools item | Art. Nr | Size | What it is for |
|---|---|---|---|
| Rubber Grout Float | 611701 | 95 × 245 mm | Pressing grout into tile joints and striking off the excess |
| Aluminum Hand Sander | 301090 | 80 × 235 mm | Abrasive-backed hand sanding of set surfaces |
| Hook-and-Loop Sponge Float | 611685 | 130 × 270 mm | Holding a hook-and-loop sponge pad for washing down |
| Sponge Float | 611686 | 130 × 305 mm | Sponge finishing and final haze removal |
| Attribute | 611701 (95 × 245 mm) | Common full-size alternatives |
|---|---|---|
| Pad size | 95 × 245 mm (approx. 3-3/4" × 9-5/8") | 9" × 4" (229 × 102 mm) is a common size |
| Handle | Fixed arched bridge, in-plane | Also sold with offset / toe-kick handles for low and recessed access |
| Joint width | Grout to specify | Note |
|---|---|---|
| ≥ 1/8" (about 3 mm) | Sanded grout | Sand gives the wider joint its strength |
| < 1/8" (about 3 mm) | Unsanded grout | Sanded grout will not compact cleanly into narrow joints |
| Any width, chemical or stain resistance required | Epoxy grout | Compatibility of the rubber face with epoxy grout: please contact us |
Complete art-number and size reference for the Leading Tools Rubber Grout Float.
| Art. Nr | Size | Working face | Handle |
|---|---|---|---|
| 611701 | 95 mm × 245 mm | Blue rubber pad | White arched bridge handle |

In compliance with EU personal data protection laws, we are committed to protecting and providing you with control over your personal data. By clicking "Accept All", you allow us to place cookies to enhance your experience on this site, help us analyze site performance and usage, and enable us to deliver relevant marketing content. You can manage your cookie settings below. By clicking "Agree" you agree to the current settings. For more information, please visit the Privacy Statement.
This website uses cookies
In compliance with EU personal data protection laws, we are committed to protecting your personal data and providing you with control over it. By clicking "Agree", you allow us to place cookies to improve your experience on this site, help us analyze site performance and usage, and allow us to deliver relevant marketing content.
By clicking "Only necessary" you allow us to place only necessary cookies. The website cannot function without these cookies and you cannot switch them off on your system. These cookies are typically set only in response to an action you perform (i.e. a service request), such as setting privacy preferences, logging in, or filling in a form. You can set your browser to block or prompt you for these cookies, but this may prevent some site features from working.



