
Copyright 2026 © Leading Tools Industrial Co., Ltd.
All Rights Reserved. Website Design by Awakening Design
CATALOG TYPE
Product Categories
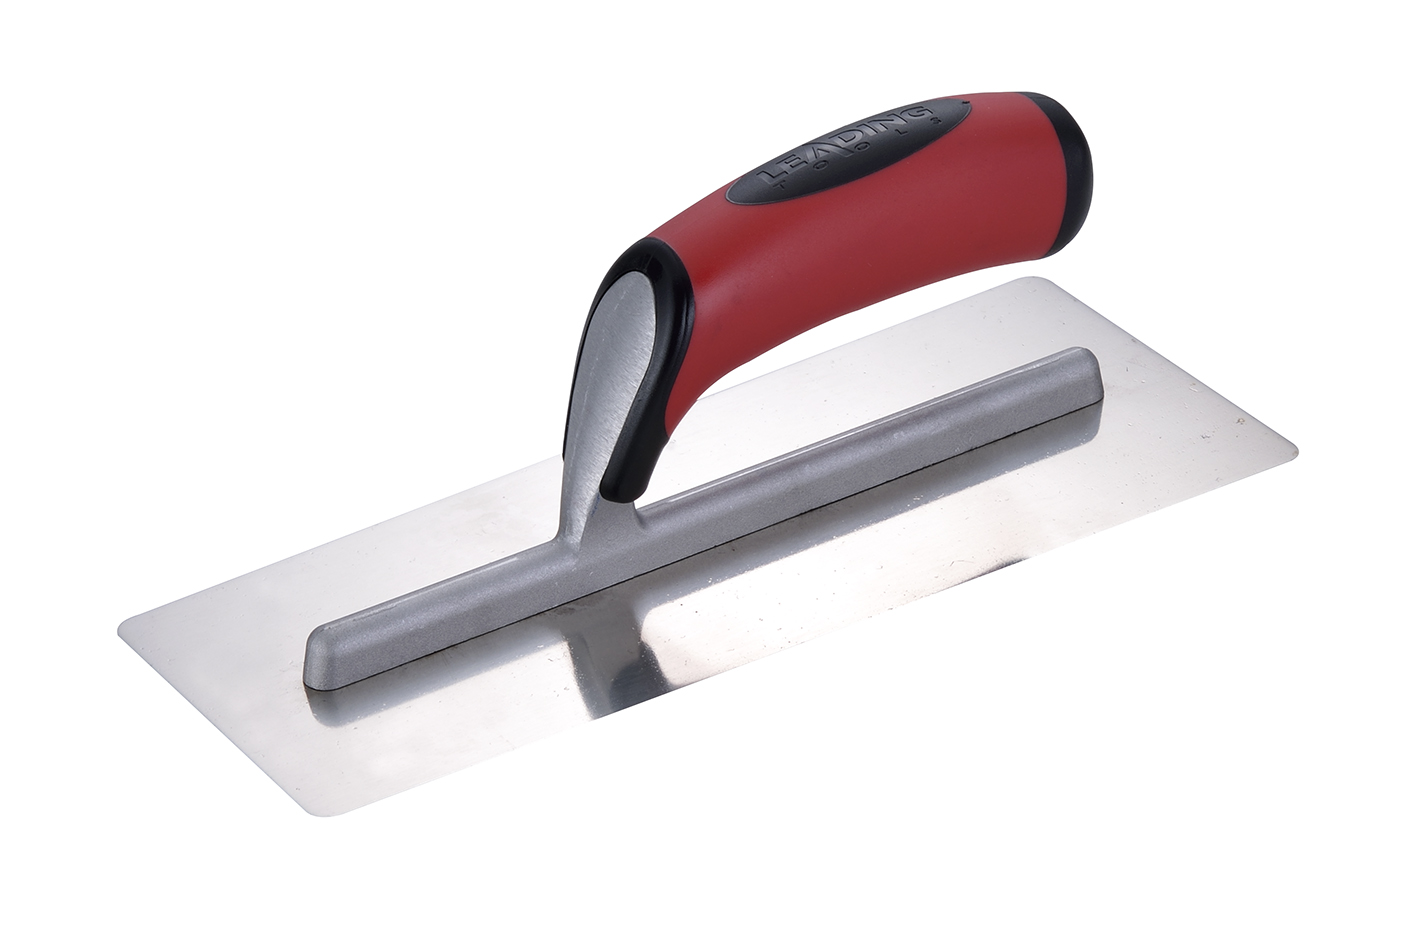
Finishing Trowel
Product Description
| Item | Detail |
|---|---|
| Product name | Finishing Trowel |
| Article numbers | 690721, 691721 |
| Product family | Plaster Trowel |
| Size, 690721 | 100mm x 114mm x 280mm |
| Size, 691721 | 70mm x 80mm x 200mm |
| Construction | Spot Riveted |
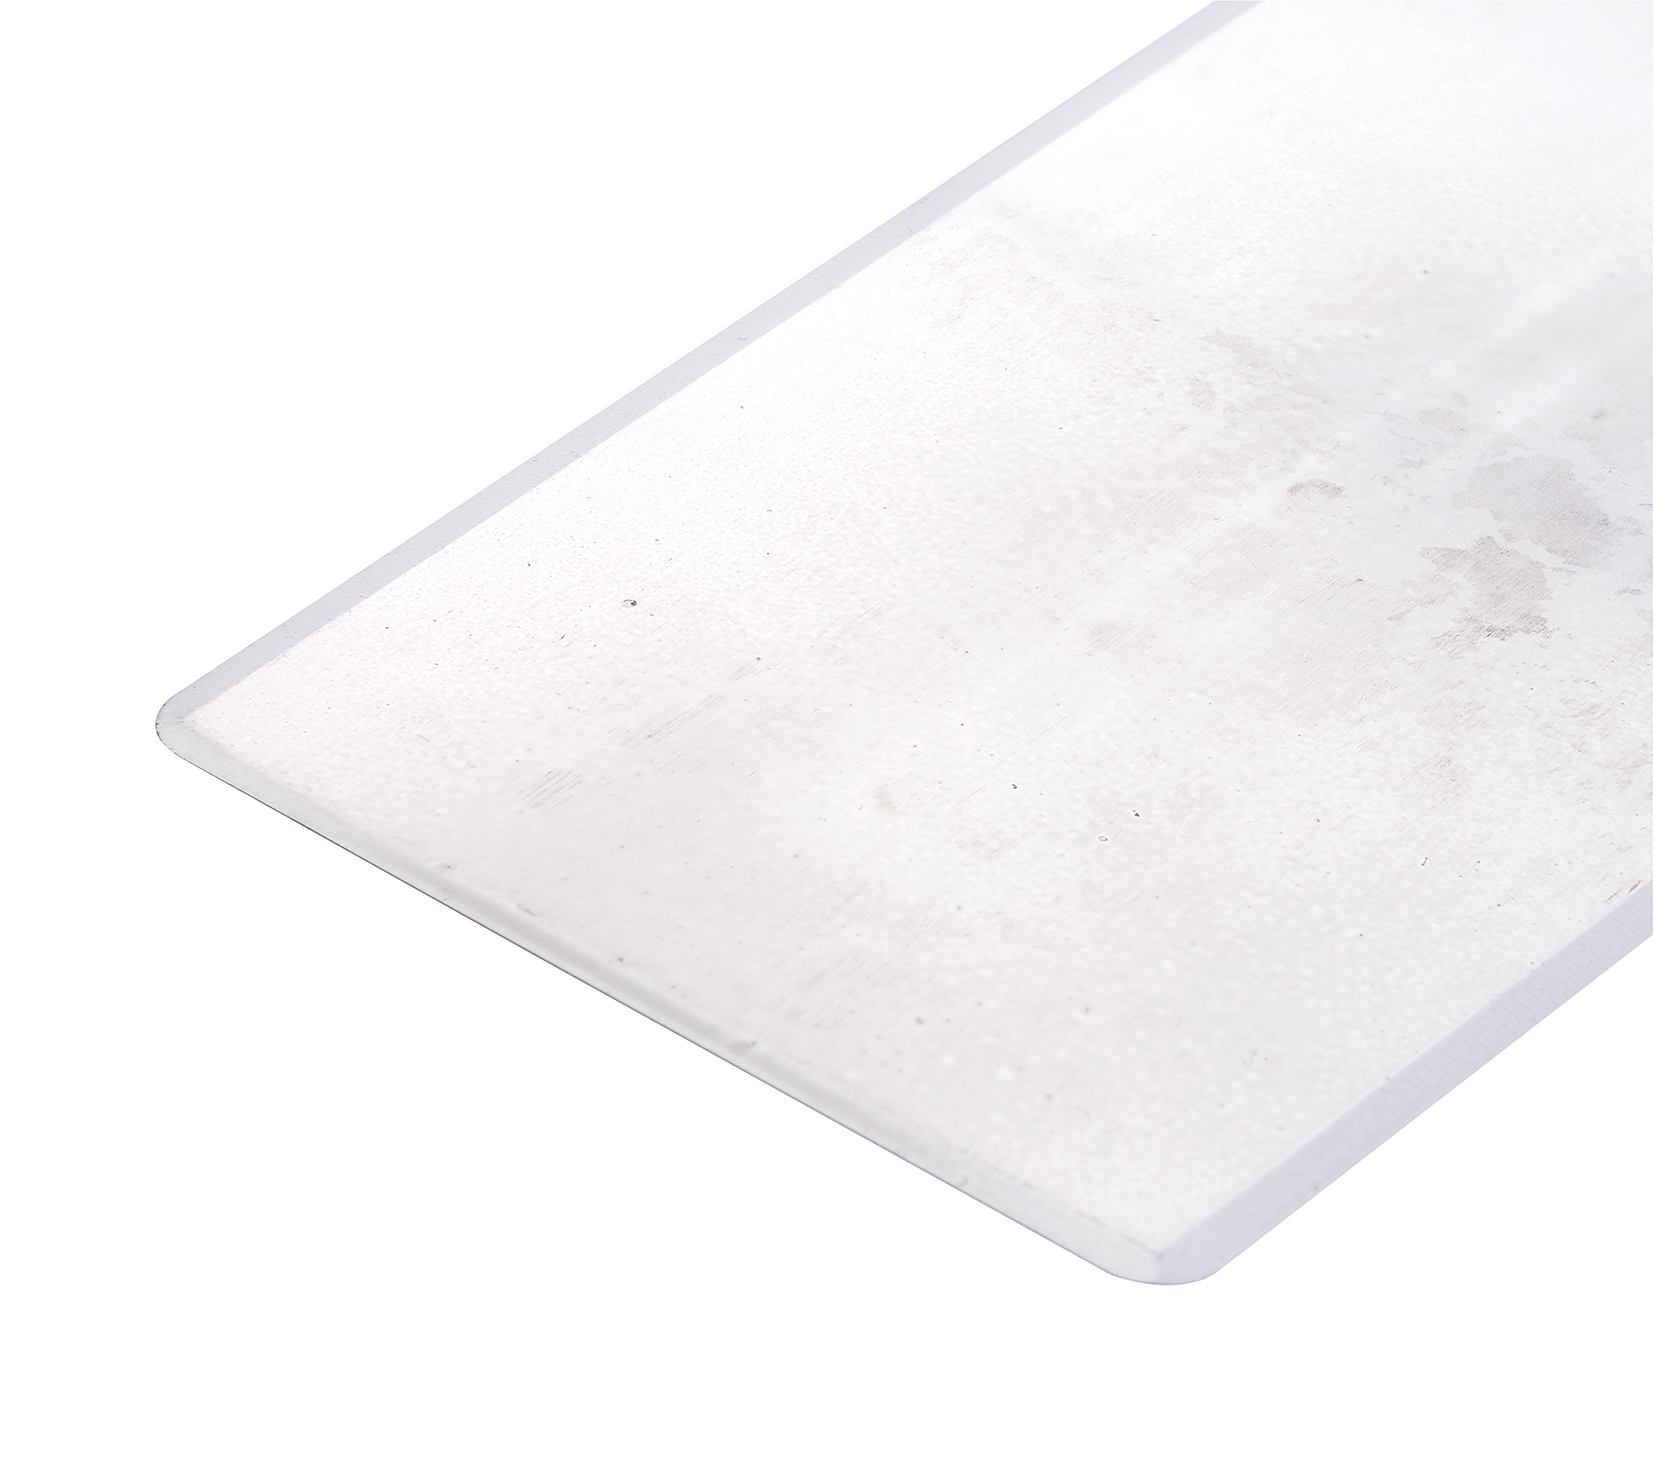
| Edge | Chamfer Edge |
| Blade material | Carbon steel, polished; for stainless steel, contact sales |
| Handle | Ergonomic soft-grip, red and black, on an aluminum mount |
| Note | Quality Consistent |
The Finishing Trowel is the professional finishing member of the Leading Tools Plaster Trowel line and sits alongside the entry-level DIY Trowel 611510 / 611511 / 611512 in the same line.
The two differ as follows: the DIY Trowel is a light one-piece plastic-handle tool for spreading and leveling, while the Finishing Trowel carries a chamfered edge, a Spot Riveted aluminum mount and a soft-grip handle, and is built for the closing passes that decide how the wall actually looks. It is offered in two sizes, 690721 and 691721, both with a polished carbon steel blade; for stainless steel, contact sales.
| Advantage | What it means on the job | Who benefits most |
|---|---|---|
| Chamfered edge | The blade can be laid almost flat into partly set material without the edge biting; fewer tram lines means less patching and less sanding afterwards | Finishers working to a paint-ready standard |
| Compact blade footprint | Follows a wall that is not perfectly flat instead of bridging it, and reaches into reveals, around boxes and behind fittings that a 14–18 inch blade skips | Renovation, patch-repair and fit-out crews |
| Stainless steel through sales for lime and moist work | Far less risk of rust marks in a light-colored finish, and less daily maintenance | Lime plaster, Venetian plaster and bathroom work |
| Soft-grip handle on an aluminum mount | Finishing is repetitive low-force work over long sessions, and grip comfort decides how long an operator can hold a consistent pass | Professional plasterers working full days |
| Two sizes on the same geometry | The finish produced by 691721 in a corner matches the finish produced by 690721 on the open field, because the edge geometry is the same | Anyone who has to make a repair invisible |
| Surface condition | Use the Finishing Trowel? | What to do instead |
|---|---|---|
| Freshly applied, wet and glistening | No | Continue with the application trowel; the finishing blade will smear and drag the material |
| Sheen just gone, surface still soft | Not yet | Wait; a pass now leaves the tool's own marks |
| "Thumb-print hard": sheen gone, a light thumb press leaves only a faint mark, surface firm but not cured | Yes, this is the window | Begin the closing passes |
| Firm and drying fast in hot or windy conditions | Yes, but assist it | Carry a thin film of water on the blade or mist the surface to extend the workable time |
| Fully set and hard | No | The window has closed; correct by abrasion, not by trowel |
| Base coat that needs to be leveled or built up | No | Use an application trowel; the finishing tool is for closing, not for carrying material |
| Tile adhesive | No | Use a notched trowel |
| Rounding a concrete or render arris | No | Use an edging trowel |
The finishing window is the whole skill. Start the final trowel at the thumb-print-hard stage. The practical consequence is that the work must be fast and regular, because if the material dries before the pass is complete you cannot go back over it.
| Step | Action | Notes |
|---|---|---|
| 1. Test | Press a thumb on an inconspicuous area | The surface should be firm with only a faint print; if it dents, wait |
| 2. Clean the blade | Wipe the blade and the chamfer clean before starting | Hardened crumbs trapped at the bevel roll under the blade and cut arcs into the finish |
| 3. Angle | Lay the blade close to flat and lift the leading edge only enough to stop it biting | From near-flat up to about 20°, with a circular motion. |
| 4. Pressure | Enough pressure to close and compact the surface, applied steadily and evenly | Firm, steady pressure at the correct angle, with enough force to shape the surface. |
| 5. Motion | Long, continuous, overlapping passes; complete a direction before reversing | Overlaps are less visible because the edge is chamfered |
| 6. Water | On the last pass, carry a very thin film of water on the blade | This is a technique for extending workability and closing the surface |
| 7. Clean between passes | Wipe the blade whenever material builds on it | A loaded blade drags material instead of closing it |
| 8. Second pass | Repeat as the surface firms further | Each pass at a later stage compacts and polishes more than the last |
Gypsum base coat and float coat; gypsum finish and skim coat; setting-type and drying-type joint compound; lime putty plaster; hydraulic lime plaster; cement-lime render topping; polymer-modified finishes; Venetian plaster and stucco. It is also used to close crack and hole repairs.
For a polished finish on gypsum: wait until the surface is thumb-print hard, put a very thin film of water on the blade, and take the closing passes with the blade nearly flat. Successive passes as the material continues to firm are what build the sheen; a single heavy pass will not produce it. A stainless steel blade (contact sales) is the better choice here because carbon steel can leave a gray metal deposit on a very light finish.
Venetian plaster is applied in multiple thin coats, each closed and burnished as it sets but while still workable. A stainless steel blade (contact sales) keeps rust marks out of a translucent finish; keep the blade close to flat, and let repeated passes rather than force build the depth and shine. The chamfer matters more here than anywhere else, because a hard edge leaves a visible line in a finish that is meant to read as continuous.
Lime is more flexible and sets far more slowly than gypsum, so the working window is longer but the surface is easier to open up again.
The chamfered edge helps by riding over the breathable surface rather than cutting into it, and a stainless steel blade (contact sales) is the right choice for corrosion resistance in a wet, alkaline material. Work when the surface has reached the firm stage, mist to extend workability where the weather is drying the work too fast, and protect fresh lime work from direct sun and wind during curing.
On drywall joints and small areas, the Finishing Trowel is used to apply and close thin skim coats of joint compound rather than to build thickness. Multiple thin passes with the blade nearly flat produce a flatter result and less sanding than one thick coat, and the chamfered edge is what allows a skim to be feathered out without the edge cutting a line into it.
For crack and hole repair, work the trowel at an angle to the wall so the material is pushed to an even thickness across the repair, then close it with the flat of the blade.
This is where the 691721 earns its place: the smaller blade stays in contact with a small repair area instead of bridging across it, and the chamfered edge lets the repair be feathered into sound surrounding plaster. A sponge float can be used as a second stage after the steel pass for a matte, even texture.
Q1. When exactly should I switch from the application trowel to the Finishing Trowel?
A. When the surface has lost its sheen and a light thumb press leaves only a faint mark, the "thumb-print hard" stage. Earlier than that, the finishing blade drags and smears; later, the material will not move at all.
Q2. Carbon steel or stainless steel?
A. The listed art numbers are polished carbon steel; each art number corresponds to one blade material.
Stainless steel suits lime plasters, Venetian plaster, bathrooms, exterior work and any light-colored finish where rust staining would show, and anyone who will not oil a tool every night; contact Leading Tools sales for it. The carbon steel art numbers suit general dry gypsum work, as long as the tool is cleaned, dried and oiled after each use.
Q3. What is the difference between 690721 and 691721?
A. Size only. 690721 is 100mm x 114mm x 280mm and 691721 is 70mm x 80mm x 200mm; edge, construction, handle and material options are identical. Buy the larger one for general finishing and the smaller one for reveals, patches and work behind fittings.
Q4. I am getting tram lines or gauge marks. What is wrong?
A. Either the leading edge is lifted too high so it cuts instead of riding, the pressure is uneven, or hardened material is stuck at the chamfer and dragging across the surface. Lower the angle, clean the blade, and check the chamfer for nicks.
Q5. Can I use it on large open walls?
A. You can, but it is not the efficient tool for it. This trowel sits at the compact end of the range and is chosen for control and access, not for coverage rate. Blades of 12–18 inches are the general finishing size for open walls.
| Item | 690721 | 691721 |
|---|---|---|
| Size (nominal) | 100mm x 114mm x 280mm | 70mm x 80mm x 200mm |
| Construction | Spot Riveted | Spot Riveted |
| Edge | Chamfer Edge | Chamfer Edge |
| Blade material | Carbon steel, polished | Carbon steel, polished |
| Handle | Ergonomic soft-grip on aluminum mount | Ergonomic soft-grip on aluminum mount |
| Note | Quality Consistent | Quality Consistent |
How to read the size field. The size is printed in the catalog as 100mm x 114mm x 280mm; contact Leading Tools sales to confirm what each figure refers to.
A flat, untoothed rectangle with a chamfered edge. Because the face is flat it spreads and compacts material rather than combing it. The edge is chamfered rather than sharp.
| Feature | Description |
|---|---|
| Handle type | Ergonomic contoured soft grip |
| Grip color | Two-tone, red and black |
| Mounting | Aluminum mount, Spot Riveted |
The listed art numbers are polished carbon steel. Each art number corresponds to one blade material; for a stainless steel blade, contact Leading Tools sales. The comparison below is for reference.
| Variant | Blade material | Best for | Trade-off |
|---|---|---|---|
| Carbon Steel (CS) | Carbon steel blade | General gypsum and cement plastering where the tool is cleaned and oiled after every use | Rusts if left wet; rust can bloom into a light finish |
| Stainless Steel (SS) | Stainless steel blade | Lime plasters, Venetian plaster, bathrooms and exterior work; anywhere the finish must stay uncontaminated | Some finishers find it slides differently on the first passes |
A stainless steel blade (contact sales) is the better choice for the final polish on dolomite-lime and gypsum plasters, because it is far less likely to leave rust or metal marks on the surface it is polishing.
| Consideration | Recommendation |
|---|---|
| General finishing, walls and ceilings within reach | 690721: the larger of the two, more surface closed per pass |
| Tight work: reveals, behind pipework, cupboards, small patches | 691721 (70mm x 80mm x 200mm): same edge geometry, smaller footprint |
| Lime plasters, lime putty, Venetian plaster | Stainless steel blade (contact sales), to keep rust out of a light-colored finish |
| Bathrooms, kitchens, exterior render | Stainless steel blade (contact sales), for corrosion resistance |
| Gypsum finish coats, dry interior work | The listed carbon steel art numbers suit this work if the tool is cleaned and oiled |
| High-gloss or burnished finish required | Stainless steel blade (contact sales) |
| Loading and leveling base coats | Not this tool: use a larger application trowel from the Plaster Trowel range |
| Large open walls at production speed | Not this tool: a 12–18 inch finishing blade is the class for that work |
| Spreading tile adhesive | Not this tool: use a notched trowel such as the German Standard Notched Trowel (702301-74 to -82) |
| Trowel type | Primary use | How it differs from the Finishing Trowel |
|---|---|---|
| Application / laying-on trowel | Loading and leveling base and float coats | Larger and stiffer; it moves material, it does not close a surface |
| Finishing Trowel (690721 / 691721) | Final smoothing, compaction and polish | — |
| Notched trowel | Combing adhesive to a controlled ridge height for tiling | A flat face cannot form ridges; adhesive coverage would fail |
| Margin / corner trowel | Narrow square blade for tight corners and behind services | Different geometry; used for access, not for closing a face |
All Finishing Trowel article numbers, listed in full.
| ART. Nr | Size (nominal) | Approximate imperial | Edge | Construction | Blade material | Handle |
|---|---|---|---|---|---|---|
| 690721 | 100mm x 114mm x 280mm | approx. 4" x 4-1/2" x 11" (1" = 25.4 mm) | Chamfer Edge | Spot Riveted | Carbon steel, polished | Ergonomic soft-grip on aluminum mount |
| 691721 | 70mm x 80mm x 200mm | approx. 2-3/4" x 3-1/8" x 7-7/8" (1" = 25.4 mm) | Chamfer Edge | Spot Riveted | Carbon steel, polished | Ergonomic soft-grip on aluminum mount |
Note: the imperial column is a direct conversion of the same three metric figures.
| Situation | Cleaning method |
|---|---|
| Fresh plaster on the blade | Wipe with a damp cloth immediately; never let material set on the tool |
| Set plaster on the blade | Soften with water and lift with a plastic scraper or stiff brush; do not use a steel scraper on the face, which scratches the polish that produces a smooth pass |
| Lime deposits and scale | Soften with water, then lift with a plastic scraper or nylon brush; rinse and dry thoroughly |
| General | Wash with mild soap and water, then dry completely before storing |
| Item | Detail |
|---|---|
| Product name | Finishing Trowel |
| Article numbers | 690721, 691721 |
| Product family | Plaster Trowel |
| Size, 690721 | 100mm x 114mm x 280mm |
| Size, 691721 | 70mm x 80mm x 200mm |
| Construction | Spot Riveted |
| Edge | Chamfer Edge |
| Blade material | Carbon steel, polished; for stainless steel, contact sales |
| Handle | Ergonomic soft-grip, red and black, on an aluminum mount |
| Note | Quality Consistent |
The Finishing Trowel is the professional finishing member of the Leading Tools Plaster Trowel line and sits alongside the entry-level DIY Trowel 611510 / 611511 / 611512 in the same line.
The two differ as follows: the DIY Trowel is a light one-piece plastic-handle tool for spreading and leveling, while the Finishing Trowel carries a chamfered edge, a Spot Riveted aluminum mount and a soft-grip handle, and is built for the closing passes that decide how the wall actually looks. It is offered in two sizes, 690721 and 691721, both with a polished carbon steel blade; for stainless steel, contact sales.
| Advantage | What it means on the job | Who benefits most |
|---|---|---|
| Chamfered edge | The blade can be laid almost flat into partly set material without the edge biting; fewer tram lines means less patching and less sanding afterwards | Finishers working to a paint-ready standard |
| Compact blade footprint | Follows a wall that is not perfectly flat instead of bridging it, and reaches into reveals, around boxes and behind fittings that a 14–18 inch blade skips | Renovation, patch-repair and fit-out crews |
| Stainless steel through sales for lime and moist work | Far less risk of rust marks in a light-colored finish, and less daily maintenance | Lime plaster, Venetian plaster and bathroom work |
| Soft-grip handle on an aluminum mount | Finishing is repetitive low-force work over long sessions, and grip comfort decides how long an operator can hold a consistent pass | Professional plasterers working full days |
| Two sizes on the same geometry | The finish produced by 691721 in a corner matches the finish produced by 690721 on the open field, because the edge geometry is the same | Anyone who has to make a repair invisible |
| Surface condition | Use the Finishing Trowel? | What to do instead |
|---|---|---|
| Freshly applied, wet and glistening | No | Continue with the application trowel; the finishing blade will smear and drag the material |
| Sheen just gone, surface still soft | Not yet | Wait; a pass now leaves the tool's own marks |
| "Thumb-print hard": sheen gone, a light thumb press leaves only a faint mark, surface firm but not cured | Yes, this is the window | Begin the closing passes |
| Firm and drying fast in hot or windy conditions | Yes, but assist it | Carry a thin film of water on the blade or mist the surface to extend the workable time |
| Fully set and hard | No | The window has closed; correct by abrasion, not by trowel |
| Base coat that needs to be leveled or built up | No | Use an application trowel; the finishing tool is for closing, not for carrying material |
| Tile adhesive | No | Use a notched trowel |
| Rounding a concrete or render arris | No | Use an edging trowel |
The finishing window is the whole skill. Start the final trowel at the thumb-print-hard stage. The practical consequence is that the work must be fast and regular, because if the material dries before the pass is complete you cannot go back over it.
| Step | Action | Notes |
|---|---|---|
| 1. Test | Press a thumb on an inconspicuous area | The surface should be firm with only a faint print; if it dents, wait |
| 2. Clean the blade | Wipe the blade and the chamfer clean before starting | Hardened crumbs trapped at the bevel roll under the blade and cut arcs into the finish |
| 3. Angle | Lay the blade close to flat and lift the leading edge only enough to stop it biting | From near-flat up to about 20°, with a circular motion. |
| 4. Pressure | Enough pressure to close and compact the surface, applied steadily and evenly | Firm, steady pressure at the correct angle, with enough force to shape the surface. |
| 5. Motion | Long, continuous, overlapping passes; complete a direction before reversing | Overlaps are less visible because the edge is chamfered |
| 6. Water | On the last pass, carry a very thin film of water on the blade | This is a technique for extending workability and closing the surface |
| 7. Clean between passes | Wipe the blade whenever material builds on it | A loaded blade drags material instead of closing it |
| 8. Second pass | Repeat as the surface firms further | Each pass at a later stage compacts and polishes more than the last |
Gypsum base coat and float coat; gypsum finish and skim coat; setting-type and drying-type joint compound; lime putty plaster; hydraulic lime plaster; cement-lime render topping; polymer-modified finishes; Venetian plaster and stucco. It is also used to close crack and hole repairs.
For a polished finish on gypsum: wait until the surface is thumb-print hard, put a very thin film of water on the blade, and take the closing passes with the blade nearly flat. Successive passes as the material continues to firm are what build the sheen; a single heavy pass will not produce it. A stainless steel blade (contact sales) is the better choice here because carbon steel can leave a gray metal deposit on a very light finish.
Venetian plaster is applied in multiple thin coats, each closed and burnished as it sets but while still workable. A stainless steel blade (contact sales) keeps rust marks out of a translucent finish; keep the blade close to flat, and let repeated passes rather than force build the depth and shine. The chamfer matters more here than anywhere else, because a hard edge leaves a visible line in a finish that is meant to read as continuous.
Lime is more flexible and sets far more slowly than gypsum, so the working window is longer but the surface is easier to open up again.
The chamfered edge helps by riding over the breathable surface rather than cutting into it, and a stainless steel blade (contact sales) is the right choice for corrosion resistance in a wet, alkaline material. Work when the surface has reached the firm stage, mist to extend workability where the weather is drying the work too fast, and protect fresh lime work from direct sun and wind during curing.
On drywall joints and small areas, the Finishing Trowel is used to apply and close thin skim coats of joint compound rather than to build thickness. Multiple thin passes with the blade nearly flat produce a flatter result and less sanding than one thick coat, and the chamfered edge is what allows a skim to be feathered out without the edge cutting a line into it.
For crack and hole repair, work the trowel at an angle to the wall so the material is pushed to an even thickness across the repair, then close it with the flat of the blade.
This is where the 691721 earns its place: the smaller blade stays in contact with a small repair area instead of bridging across it, and the chamfered edge lets the repair be feathered into sound surrounding plaster. A sponge float can be used as a second stage after the steel pass for a matte, even texture.
Q1. When exactly should I switch from the application trowel to the Finishing Trowel?
A. When the surface has lost its sheen and a light thumb press leaves only a faint mark, the "thumb-print hard" stage. Earlier than that, the finishing blade drags and smears; later, the material will not move at all.
Q2. Carbon steel or stainless steel?
A. The listed art numbers are polished carbon steel; each art number corresponds to one blade material.
Stainless steel suits lime plasters, Venetian plaster, bathrooms, exterior work and any light-colored finish where rust staining would show, and anyone who will not oil a tool every night; contact Leading Tools sales for it. The carbon steel art numbers suit general dry gypsum work, as long as the tool is cleaned, dried and oiled after each use.
Q3. What is the difference between 690721 and 691721?
A. Size only. 690721 is 100mm x 114mm x 280mm and 691721 is 70mm x 80mm x 200mm; edge, construction, handle and material options are identical. Buy the larger one for general finishing and the smaller one for reveals, patches and work behind fittings.
Q4. I am getting tram lines or gauge marks. What is wrong?
A. Either the leading edge is lifted too high so it cuts instead of riding, the pressure is uneven, or hardened material is stuck at the chamfer and dragging across the surface. Lower the angle, clean the blade, and check the chamfer for nicks.
Q5. Can I use it on large open walls?
A. You can, but it is not the efficient tool for it. This trowel sits at the compact end of the range and is chosen for control and access, not for coverage rate. Blades of 12–18 inches are the general finishing size for open walls.
| Item | 690721 | 691721 |
|---|---|---|
| Size (nominal) | 100mm x 114mm x 280mm | 70mm x 80mm x 200mm |
| Construction | Spot Riveted | Spot Riveted |
| Edge | Chamfer Edge | Chamfer Edge |
| Blade material | Carbon steel, polished | Carbon steel, polished |
| Handle | Ergonomic soft-grip on aluminum mount | Ergonomic soft-grip on aluminum mount |
| Note | Quality Consistent | Quality Consistent |
How to read the size field. The size is printed in the catalog as 100mm x 114mm x 280mm; contact Leading Tools sales to confirm what each figure refers to.
A flat, untoothed rectangle with a chamfered edge. Because the face is flat it spreads and compacts material rather than combing it. The edge is chamfered rather than sharp.
| Feature | Description |
|---|---|
| Handle type | Ergonomic contoured soft grip |
| Grip color | Two-tone, red and black |
| Mounting | Aluminum mount, Spot Riveted |
The listed art numbers are polished carbon steel. Each art number corresponds to one blade material; for a stainless steel blade, contact Leading Tools sales. The comparison below is for reference.
| Variant | Blade material | Best for | Trade-off |
|---|---|---|---|
| Carbon Steel (CS) | Carbon steel blade | General gypsum and cement plastering where the tool is cleaned and oiled after every use | Rusts if left wet; rust can bloom into a light finish |
| Stainless Steel (SS) | Stainless steel blade | Lime plasters, Venetian plaster, bathrooms and exterior work; anywhere the finish must stay uncontaminated | Some finishers find it slides differently on the first passes |
A stainless steel blade (contact sales) is the better choice for the final polish on dolomite-lime and gypsum plasters, because it is far less likely to leave rust or metal marks on the surface it is polishing.
| Consideration | Recommendation |
|---|---|
| General finishing, walls and ceilings within reach | 690721: the larger of the two, more surface closed per pass |
| Tight work: reveals, behind pipework, cupboards, small patches | 691721 (70mm x 80mm x 200mm): same edge geometry, smaller footprint |
| Lime plasters, lime putty, Venetian plaster | Stainless steel blade (contact sales), to keep rust out of a light-colored finish |
| Bathrooms, kitchens, exterior render | Stainless steel blade (contact sales), for corrosion resistance |
| Gypsum finish coats, dry interior work | The listed carbon steel art numbers suit this work if the tool is cleaned and oiled |
| High-gloss or burnished finish required | Stainless steel blade (contact sales) |
| Loading and leveling base coats | Not this tool: use a larger application trowel from the Plaster Trowel range |
| Large open walls at production speed | Not this tool: a 12–18 inch finishing blade is the class for that work |
| Spreading tile adhesive | Not this tool: use a notched trowel such as the German Standard Notched Trowel (702301-74 to -82) |
| Trowel type | Primary use | How it differs from the Finishing Trowel |
|---|---|---|
| Application / laying-on trowel | Loading and leveling base and float coats | Larger and stiffer; it moves material, it does not close a surface |
| Finishing Trowel (690721 / 691721) | Final smoothing, compaction and polish | — |
| Notched trowel | Combing adhesive to a controlled ridge height for tiling | A flat face cannot form ridges; adhesive coverage would fail |
| Margin / corner trowel | Narrow square blade for tight corners and behind services | Different geometry; used for access, not for closing a face |
All Finishing Trowel article numbers, listed in full.
| ART. Nr | Size (nominal) | Approximate imperial | Edge | Construction | Blade material | Handle |
|---|---|---|---|---|---|---|
| 690721 | 100mm x 114mm x 280mm | approx. 4" x 4-1/2" x 11" (1" = 25.4 mm) | Chamfer Edge | Spot Riveted | Carbon steel, polished | Ergonomic soft-grip on aluminum mount |
| 691721 | 70mm x 80mm x 200mm | approx. 2-3/4" x 3-1/8" x 7-7/8" (1" = 25.4 mm) | Chamfer Edge | Spot Riveted | Carbon steel, polished | Ergonomic soft-grip on aluminum mount |
Note: the imperial column is a direct conversion of the same three metric figures.
| Situation | Cleaning method |
|---|---|
| Fresh plaster on the blade | Wipe with a damp cloth immediately; never let material set on the tool |
| Set plaster on the blade | Soften with water and lift with a plastic scraper or stiff brush; do not use a steel scraper on the face, which scratches the polish that produces a smooth pass |
| Lime deposits and scale | Soften with water, then lift with a plastic scraper or nylon brush; rinse and dry thoroughly |
| General | Wash with mild soap and water, then dry completely before storing |

In compliance with EU personal data protection laws, we are committed to protecting and providing you with control over your personal data. By clicking "Accept All", you allow us to place cookies to enhance your experience on this site, help us analyze site performance and usage, and enable us to deliver relevant marketing content. You can manage your cookie settings below. By clicking "Agree" you agree to the current settings. For more information, please visit the Privacy Statement.
This website uses cookies
In compliance with EU personal data protection laws, we are committed to protecting your personal data and providing you with control over it. By clicking "Agree", you allow us to place cookies to improve your experience on this site, help us analyze site performance and usage, and allow us to deliver relevant marketing content.
By clicking "Only necessary" you allow us to place only necessary cookies. The website cannot function without these cookies and you cannot switch them off on your system. These cookies are typically set only in response to an action you perform (i.e. a service request), such as setting privacy preferences, logging in, or filling in a form. You can set your browser to block or prompt you for these cookies, but this may prevent some site features from working.



