
Copyright 2026 © Leading Tools Industrial Co., Ltd.
All Rights Reserved. Website Design by Awakening Design
CATALOG TYPE
Product Categories
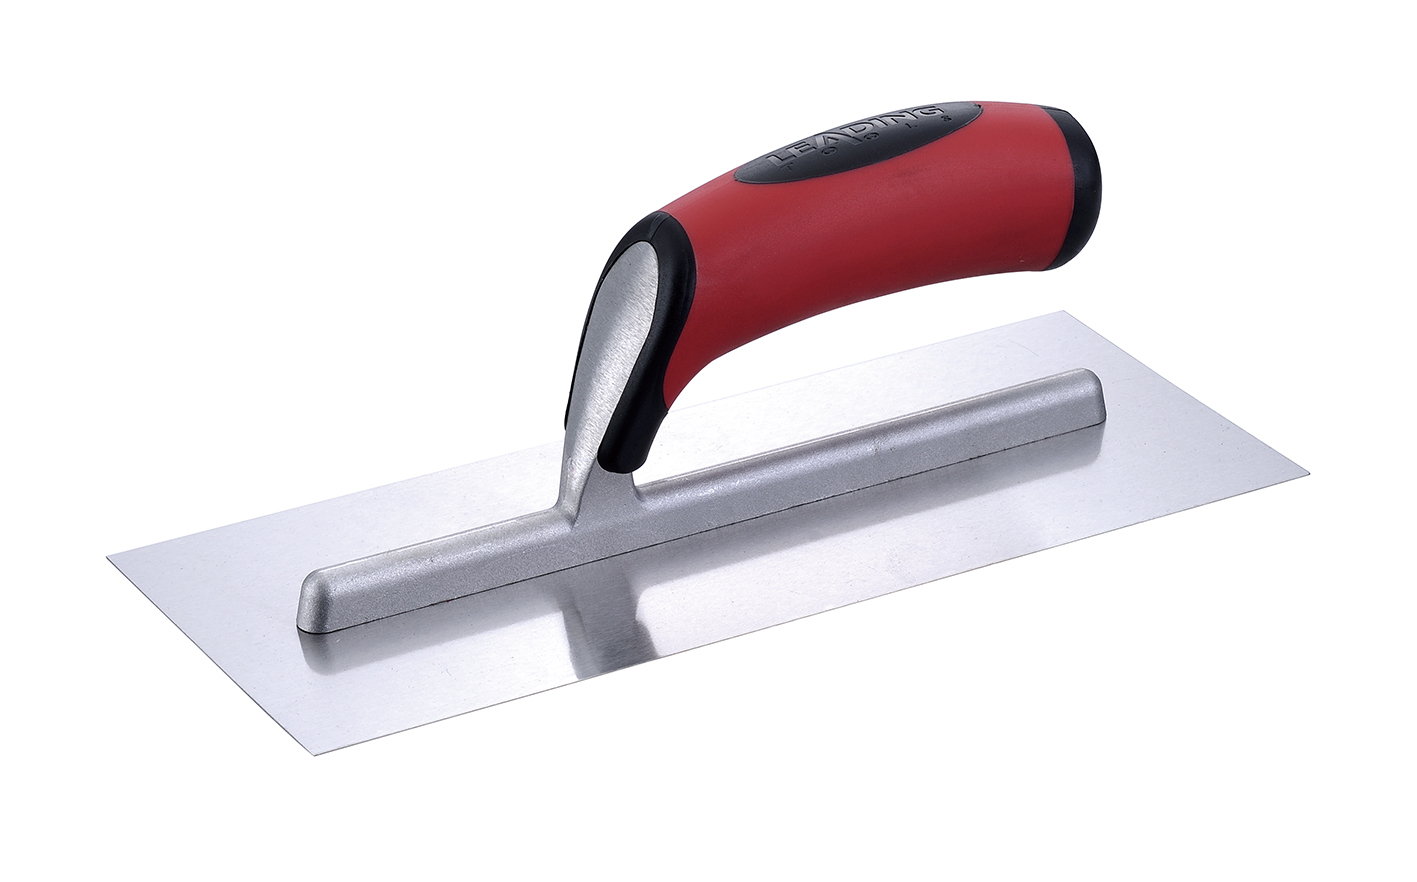
Spot Riveted Plaster Trowel
Product Description
Spot Riveted Plaster Trowel — Art. Nr 631821, blade 3" × 11" (76 × 279 mm)
The Spot Riveted Plaster Trowel is a flat rectangular trowel for applying, floating and finishing plaster, render and skim coats. Art. Nr 631821 is the narrowest and shortest member of the range; the same construction is offered in 15 art numbers spanning 3" to 4-3/4" blade widths and 11" to 18" blade lengths, with a stainless steel blade; for carbon steel, contact sales.
The designation "Spot Riveted" refers to how the blade is joined to the mount: by spot-riveting. For mount material and joint details, contact us. Each art number corresponds to one construction and one blade material. Notched versions of this blade, with U, V or square notches, are covered on the Notched Trowel page; their art numbers add a two-digit notch code to the blade art number.
1. The 11" length is the control size. An 11" blade is the easiest length to keep flat against the wall, which is why it is the recommended starting size before a plasterer steps up to 14". On 631821 this is combined with the narrowest 3" width, giving the lowest blade area in the range and therefore the least suction to fight when the trowel is loaded, which suits repair, reveal and ceiling work.
2. Spot Riveted mount. The blade is joined to the mount by spot-riveting; for mount material and joint details, contact us.
3. Stainless blade across the whole size grid. All 15 art numbers are stainless steel, so a contractor can standardize on one handle, one mount geometry and one size grid. That matters for crews who want identical tool feel across a van. Each art number corresponds to one blade material; crews that prefer carbon steel for cement and base coats can contact Leading Tools sales for a carbon steel blade.
4. Repair and patch work. The maneuverability of the short narrow blade suits repair work:
| Stage / Situation | Use this trowel? | Why |
|---|---|---|
| Laying on the first (scratch) coat | Yes | The flat blade is the laying-on role; for a carbon steel blade, contact sales |
| Floating / leveling the brown coat | Yes | Longer passes level the coat; a darby or straightedge is used between passes for broad leveling |
| Finish / skim coat | Yes, stainless steel preferred | Stainless avoids the rust marks a carbon blade can leave on a light surface; ease the corners and edges with fine abrasive paper before finish work |
| Lime putty and NHL renders | Yes, stainless steel only | Lime is aggressive to carbon steel and rust transfer stains the surface |
| Internal corners, reveals, patches | Yes, 3" or 4" width | The square corner and short blade reach where a 16"–18" blade cannot |
| Mixing plaster or scooping from a bucket | No | That is a gauging trowel's job: round nose, V-spine |
| Spreading tile adhesive to a notched bed | No | Requires a notched trowel sized to the tile |
| Final polishing of very smooth finishes | Use a dedicated finishing trowel | Laying on and final polishing are separate passes best done with separate tools |
Proper grip is fundamental to effective plastering and extends tool life:
| Step | Action | Detail |
|---|---|---|
| 1 | Prepare the substrate | The wall must be clean and damp but not soaking. A dry substrate draws water out of the plaster too quickly and causes shrinkage cracking |
| 2 | Load the trowel | Scoop mixed material from the hawk. Hold the trowel at a low angle, press the leading edge into the material and let it roll onto the blade; a well-loaded trowel carries material across most of the blade face |
| 3 | Set the application angle | Apply at roughly 30° to the wall; flatten the angle progressively as material leaves the blade |
| 4 | Spreading pass | Start from the lower part of the wall and draw the trowel in long, smooth, overlapping strokes; feather the edge of each strip into the previous one to avoid ridges, and do not let the leading edge bite into the material |
| 5 | Setting down | When the plaster firms: a light impression under thumb pressure, the first pass is complete. Let each subsequent pass firm before the next |
| 6 | Finishing angle | For floating and finishing passes drop the blade to roughly 5–10° and use light pressure |
| Coat | Trowel work |
|---|---|
| Scratch coat | Apply at approx. 30°, then scratch a horizontal key into the surface while still workable, using the corner of the trowel |
| Brown / float coat | Apply after the scratch coat has firmed; longer passes to level, with a darby or straightedge between passes |
| Finish / skim coat | Thin coats at a near-flat angle; multiple thin passes beat one thick pass |
Coat thicknesses and waiting times follow the material manufacturer's specification.
The Spot Riveted trowel is also used for finish coat application:
The square corners of this trowel suit:
Tilt the trowel slightly and draw it along the corner bead or the existing plaster edge.
3" and 4" widths (631821, 641821) are the sizes to reach for on repairs:
Ceiling patches: work overhead with the 3" × 11" (631821): the smallest blade in the range keeps arm loading and reach lowest. Reveals: use the leading edge and square corner to work material into door and window reveals.
Lime work requires careful moisture management and a stainless blade:
In EIFS work the adhesive bed is combed on with a notched trowel, after which the flat Spot Riveted trowel is used to:
Q1: Which size should I order first, 631821 (3" × 11") or a 14" trowel?
A: For repair crews, ceiling work, reveals and anyone still building trowel control, order 11" first, because it is the easiest length to keep flat. For general wall plastering, 14" is a common general-purpose size. Many crews carry both: 631821 for detail and corners, and a 4" × 14" (644821) for the wall.
Q2: Should I buy carbon steel or stainless steel?
A: Carbon steel blades cost less, but must be wiped dry and given a thin coat of tool oil after use, or they will rust. Stainless steel has high corrosion resistance and low maintenance and is the right choice for finish coats, lime plasters and wet environments.
If the tool will sit unused between jobs, or the crew will not follow an oiling routine, buy stainless. The listed art numbers are stainless steel; each art number corresponds to one blade material, so for carbon steel contact Leading Tools sales.
Q3: Plaster is pulling away from the blade and tearing off the wall. What is wrong?
A: Four likely causes, in order of frequency: dried plaster residue on the blade, which is the most common, so clean it off completely with a nylon brush and warm water; a mix that is too dry or stiff; a blade angle that is too steep, so bring it down toward 30° for laying on and 5–10° for finishing; or the wrong blade for the material, so switch to stainless for finish coats and lime plasters.
Q4: What does "Spot Riveted" mean?
A: It describes how the blade is joined to the mount: by spot-riveting. For mount material and joint details, contact us.
Q5: My hands blister and fatigue by the afternoon. What can I change?
A: Adjust the grip: hold closer to the heel of the palm and use the fingers rather than the whole arm for pressure control. Drop to a smaller width (3" or 4") for overhead and ceiling work, take regular breaks, and keep the grip surface clean and dry. The soft grip only helps if it is not caked in material.
The defining structural feature of this range is the Spot Riveted mounting system:
| Specification | Value |
|---|---|
| Art. Nr | 631821 |
| Blade Width | 3 inches (76 mm) |
| Blade Length | 11 inches (279 mm) |
| Blade Material | Stainless steel |
| Handle | Soft-grip handle (F21), Spot Riveted mount |
The range extends from the narrow 3-inch widths used for detail and repair work up to 4-3/4-inch widths for broad surface coverage.
| Width | Art. Nr | Best For |
|---|---|---|
| 3" (76 mm) | 631821, 634821, 636821 | Detail work, repairs, patches, ceilings, narrow walls, arch reveals, door/window reveals |
| 4" (102 mm) | 641821, 644821, 646821, 648821 | General wall plastering and rendering: a versatile width |
| 4-1/2" (114 mm) | 661821, 664821, 666821, 668821 | Broad surface coverage, faster application on large flat walls |
| 4-3/4" (121 mm) | 670821, 674821, 676821, 678821 | Maximum coverage; large-area commercial work |
Note that the 3" width is offered in 11", 14" and 16" only: there is no 3" × 18" in the range.
| Length | Best For |
|---|---|
| 11" (279 mm) | Tight spaces, ceilings, reveals and repairs; the easiest length to control and the size recommended to learners before moving up |
| 14" (356 mm) | A common general-purpose length; balances coverage against control |
| 16" (406 mm) | Broad coverage; long smooth passes on large flat surfaces |
| 18" (457 mm) | Large commercial walls: fewest passes to cover an area, but demands the most technique to keep flat |
Practical rule: buy 11" for repair, reveal and ceiling crews; 14" as the general issue size; 16"–18" only for crews already working large flat elevations.
The listed art numbers are stainless steel. Each art number corresponds to one blade material; for a carbon steel blade, contact Leading Tools sales. The comparison below is for reference.
| Criteria | Carbon Steel | Stainless Steel |
|---|---|---|
| Corrosion resistance | Lower, will rust if left wet | High, but chlorinated water, coastal air or prolonged soaking can still cause rust spots |
| Maintenance | Dry and oil after every wet use | Wipe clean; no oiling regime |
| Preferred use | Base coats, cement-lime renders | Finish coats, lime plasters, wet environments |
Recommendation:
This range is supplied with a soft-grip handle (F21). For other handle types, contact Leading Tools sales.
All 15 art numbers in the Spot Riveted Plaster Trowel range. Every size is stainless steel, with the same Spot Riveted mount and soft-grip handle; for carbon steel, contact sales.
| Art. Nr | Blade Width | Blade Length | Blade Material | Handle |
|---|---|---|---|---|
| 631821 | 3" (76 mm) | 11" (279 mm) | Stainless steel | Spot Riveted, soft-grip |
| 634821 | 3" (76 mm) | 14" (356 mm) | Stainless steel | Spot Riveted, soft-grip |
| 636821 | 3" (76 mm) | 16" (406 mm) | Stainless steel | Spot Riveted, soft-grip |
| 641821 | 4" (102 mm) | 11" (279 mm) | Stainless steel | Spot Riveted, soft-grip |
| 644821 | 4" (102 mm) | 14" (356 mm) | Stainless steel | Spot Riveted, soft-grip |
| 646821 | 4" (102 mm) | 16" (406 mm) | Stainless steel | Spot Riveted, soft-grip |
| 648821 | 4" (102 mm) | 18" (457 mm) | Stainless steel | Spot Riveted, soft-grip |
| 661821 | 4-1/2" (114 mm) | 11" (279 mm) | Stainless steel | Spot Riveted, soft-grip |
| 664821 | 4-1/2" (114 mm) | 14" (356 mm) | Stainless steel | Spot Riveted, soft-grip |
| 666821 | 4-1/2" (114 mm) | 16" (406 mm) | Stainless steel | Spot Riveted, soft-grip |
| 668821 | 4-1/2" (114 mm) | 18" (457 mm) | Stainless steel | Spot Riveted, soft-grip |
| 670821 | 4-3/4" (121 mm) | 11" (279 mm) | Stainless steel | Spot Riveted, soft-grip |
| 674821 | 4-3/4" (121 mm) | 14" (356 mm) | Stainless steel | Spot Riveted, soft-grip |
| 676821 | 4-3/4" (121 mm) | 16" (406 mm) | Stainless steel | Spot Riveted, soft-grip |
| 678821 | 4-3/4" (121 mm) | 18" (457 mm) | Stainless steel | Spot Riveted, soft-grip |
All sizes above are the Leading Tools ART. Nr specifications. Inch dimensions are the nominal values; millimeter figures are conversions at 1" = 25.4 mm, rounded to the nearest millimeter.
| Interval | Task |
|---|---|
| After every session | Clean, dry and (carbon steel) oil the blade |
| Weekly, heavy use | Check the mount for movement; check the handle-to-mount attachment |
| Monthly | Deep clean the blade; remove nicks and burrs with fine abrasive paper if needed; check the handle body for cracks |
| Quarterly | Full mount inspection; check blade flatness against a straightedge |
Flatness is what determines whether the tool can still produce a finish:
Spot Riveted Plaster Trowel — Art. Nr 631821, blade 3" × 11" (76 × 279 mm)
The Spot Riveted Plaster Trowel is a flat rectangular trowel for applying, floating and finishing plaster, render and skim coats. Art. Nr 631821 is the narrowest and shortest member of the range; the same construction is offered in 15 art numbers spanning 3" to 4-3/4" blade widths and 11" to 18" blade lengths, with a stainless steel blade; for carbon steel, contact sales.
The designation "Spot Riveted" refers to how the blade is joined to the mount: by spot-riveting. For mount material and joint details, contact us. Each art number corresponds to one construction and one blade material. Notched versions of this blade, with U, V or square notches, are covered on the Notched Trowel page; their art numbers add a two-digit notch code to the blade art number.
1. The 11" length is the control size. An 11" blade is the easiest length to keep flat against the wall, which is why it is the recommended starting size before a plasterer steps up to 14". On 631821 this is combined with the narrowest 3" width, giving the lowest blade area in the range and therefore the least suction to fight when the trowel is loaded, which suits repair, reveal and ceiling work.
2. Spot Riveted mount. The blade is joined to the mount by spot-riveting; for mount material and joint details, contact us.
3. Stainless blade across the whole size grid. All 15 art numbers are stainless steel, so a contractor can standardize on one handle, one mount geometry and one size grid. That matters for crews who want identical tool feel across a van. Each art number corresponds to one blade material; crews that prefer carbon steel for cement and base coats can contact Leading Tools sales for a carbon steel blade.
4. Repair and patch work. The maneuverability of the short narrow blade suits repair work:
| Stage / Situation | Use this trowel? | Why |
|---|---|---|
| Laying on the first (scratch) coat | Yes | The flat blade is the laying-on role; for a carbon steel blade, contact sales |
| Floating / leveling the brown coat | Yes | Longer passes level the coat; a darby or straightedge is used between passes for broad leveling |
| Finish / skim coat | Yes, stainless steel preferred | Stainless avoids the rust marks a carbon blade can leave on a light surface; ease the corners and edges with fine abrasive paper before finish work |
| Lime putty and NHL renders | Yes, stainless steel only | Lime is aggressive to carbon steel and rust transfer stains the surface |
| Internal corners, reveals, patches | Yes, 3" or 4" width | The square corner and short blade reach where a 16"–18" blade cannot |
| Mixing plaster or scooping from a bucket | No | That is a gauging trowel's job: round nose, V-spine |
| Spreading tile adhesive to a notched bed | No | Requires a notched trowel sized to the tile |
| Final polishing of very smooth finishes | Use a dedicated finishing trowel | Laying on and final polishing are separate passes best done with separate tools |
Proper grip is fundamental to effective plastering and extends tool life:
| Step | Action | Detail |
|---|---|---|
| 1 | Prepare the substrate | The wall must be clean and damp but not soaking. A dry substrate draws water out of the plaster too quickly and causes shrinkage cracking |
| 2 | Load the trowel | Scoop mixed material from the hawk. Hold the trowel at a low angle, press the leading edge into the material and let it roll onto the blade; a well-loaded trowel carries material across most of the blade face |
| 3 | Set the application angle | Apply at roughly 30° to the wall; flatten the angle progressively as material leaves the blade |
| 4 | Spreading pass | Start from the lower part of the wall and draw the trowel in long, smooth, overlapping strokes; feather the edge of each strip into the previous one to avoid ridges, and do not let the leading edge bite into the material |
| 5 | Setting down | When the plaster firms: a light impression under thumb pressure, the first pass is complete. Let each subsequent pass firm before the next |
| 6 | Finishing angle | For floating and finishing passes drop the blade to roughly 5–10° and use light pressure |
| Coat | Trowel work |
|---|---|
| Scratch coat | Apply at approx. 30°, then scratch a horizontal key into the surface while still workable, using the corner of the trowel |
| Brown / float coat | Apply after the scratch coat has firmed; longer passes to level, with a darby or straightedge between passes |
| Finish / skim coat | Thin coats at a near-flat angle; multiple thin passes beat one thick pass |
Coat thicknesses and waiting times follow the material manufacturer's specification.
The Spot Riveted trowel is also used for finish coat application:
The square corners of this trowel suit:
Tilt the trowel slightly and draw it along the corner bead or the existing plaster edge.
3" and 4" widths (631821, 641821) are the sizes to reach for on repairs:
Ceiling patches: work overhead with the 3" × 11" (631821): the smallest blade in the range keeps arm loading and reach lowest. Reveals: use the leading edge and square corner to work material into door and window reveals.
Lime work requires careful moisture management and a stainless blade:
In EIFS work the adhesive bed is combed on with a notched trowel, after which the flat Spot Riveted trowel is used to:
Q1: Which size should I order first, 631821 (3" × 11") or a 14" trowel?
A: For repair crews, ceiling work, reveals and anyone still building trowel control, order 11" first, because it is the easiest length to keep flat. For general wall plastering, 14" is a common general-purpose size. Many crews carry both: 631821 for detail and corners, and a 4" × 14" (644821) for the wall.
Q2: Should I buy carbon steel or stainless steel?
A: Carbon steel blades cost less, but must be wiped dry and given a thin coat of tool oil after use, or they will rust. Stainless steel has high corrosion resistance and low maintenance and is the right choice for finish coats, lime plasters and wet environments.
If the tool will sit unused between jobs, or the crew will not follow an oiling routine, buy stainless. The listed art numbers are stainless steel; each art number corresponds to one blade material, so for carbon steel contact Leading Tools sales.
Q3: Plaster is pulling away from the blade and tearing off the wall. What is wrong?
A: Four likely causes, in order of frequency: dried plaster residue on the blade, which is the most common, so clean it off completely with a nylon brush and warm water; a mix that is too dry or stiff; a blade angle that is too steep, so bring it down toward 30° for laying on and 5–10° for finishing; or the wrong blade for the material, so switch to stainless for finish coats and lime plasters.
Q4: What does "Spot Riveted" mean?
A: It describes how the blade is joined to the mount: by spot-riveting. For mount material and joint details, contact us.
Q5: My hands blister and fatigue by the afternoon. What can I change?
A: Adjust the grip: hold closer to the heel of the palm and use the fingers rather than the whole arm for pressure control. Drop to a smaller width (3" or 4") for overhead and ceiling work, take regular breaks, and keep the grip surface clean and dry. The soft grip only helps if it is not caked in material.
The defining structural feature of this range is the Spot Riveted mounting system:
| Specification | Value |
|---|---|
| Art. Nr | 631821 |
| Blade Width | 3 inches (76 mm) |
| Blade Length | 11 inches (279 mm) |
| Blade Material | Stainless steel |
| Handle | Soft-grip handle (F21), Spot Riveted mount |
The range extends from the narrow 3-inch widths used for detail and repair work up to 4-3/4-inch widths for broad surface coverage.
| Width | Art. Nr | Best For |
|---|---|---|
| 3" (76 mm) | 631821, 634821, 636821 | Detail work, repairs, patches, ceilings, narrow walls, arch reveals, door/window reveals |
| 4" (102 mm) | 641821, 644821, 646821, 648821 | General wall plastering and rendering: a versatile width |
| 4-1/2" (114 mm) | 661821, 664821, 666821, 668821 | Broad surface coverage, faster application on large flat walls |
| 4-3/4" (121 mm) | 670821, 674821, 676821, 678821 | Maximum coverage; large-area commercial work |
Note that the 3" width is offered in 11", 14" and 16" only: there is no 3" × 18" in the range.
| Length | Best For |
|---|---|
| 11" (279 mm) | Tight spaces, ceilings, reveals and repairs; the easiest length to control and the size recommended to learners before moving up |
| 14" (356 mm) | A common general-purpose length; balances coverage against control |
| 16" (406 mm) | Broad coverage; long smooth passes on large flat surfaces |
| 18" (457 mm) | Large commercial walls: fewest passes to cover an area, but demands the most technique to keep flat |
Practical rule: buy 11" for repair, reveal and ceiling crews; 14" as the general issue size; 16"–18" only for crews already working large flat elevations.
The listed art numbers are stainless steel. Each art number corresponds to one blade material; for a carbon steel blade, contact Leading Tools sales. The comparison below is for reference.
| Criteria | Carbon Steel | Stainless Steel |
|---|---|---|
| Corrosion resistance | Lower, will rust if left wet | High, but chlorinated water, coastal air or prolonged soaking can still cause rust spots |
| Maintenance | Dry and oil after every wet use | Wipe clean; no oiling regime |
| Preferred use | Base coats, cement-lime renders | Finish coats, lime plasters, wet environments |
Recommendation:
This range is supplied with a soft-grip handle (F21). For other handle types, contact Leading Tools sales.
All 15 art numbers in the Spot Riveted Plaster Trowel range. Every size is stainless steel, with the same Spot Riveted mount and soft-grip handle; for carbon steel, contact sales.
| Art. Nr | Blade Width | Blade Length | Blade Material | Handle |
|---|---|---|---|---|
| 631821 | 3" (76 mm) | 11" (279 mm) | Stainless steel | Spot Riveted, soft-grip |
| 634821 | 3" (76 mm) | 14" (356 mm) | Stainless steel | Spot Riveted, soft-grip |
| 636821 | 3" (76 mm) | 16" (406 mm) | Stainless steel | Spot Riveted, soft-grip |
| 641821 | 4" (102 mm) | 11" (279 mm) | Stainless steel | Spot Riveted, soft-grip |
| 644821 | 4" (102 mm) | 14" (356 mm) | Stainless steel | Spot Riveted, soft-grip |
| 646821 | 4" (102 mm) | 16" (406 mm) | Stainless steel | Spot Riveted, soft-grip |
| 648821 | 4" (102 mm) | 18" (457 mm) | Stainless steel | Spot Riveted, soft-grip |
| 661821 | 4-1/2" (114 mm) | 11" (279 mm) | Stainless steel | Spot Riveted, soft-grip |
| 664821 | 4-1/2" (114 mm) | 14" (356 mm) | Stainless steel | Spot Riveted, soft-grip |
| 666821 | 4-1/2" (114 mm) | 16" (406 mm) | Stainless steel | Spot Riveted, soft-grip |
| 668821 | 4-1/2" (114 mm) | 18" (457 mm) | Stainless steel | Spot Riveted, soft-grip |
| 670821 | 4-3/4" (121 mm) | 11" (279 mm) | Stainless steel | Spot Riveted, soft-grip |
| 674821 | 4-3/4" (121 mm) | 14" (356 mm) | Stainless steel | Spot Riveted, soft-grip |
| 676821 | 4-3/4" (121 mm) | 16" (406 mm) | Stainless steel | Spot Riveted, soft-grip |
| 678821 | 4-3/4" (121 mm) | 18" (457 mm) | Stainless steel | Spot Riveted, soft-grip |
All sizes above are the Leading Tools ART. Nr specifications. Inch dimensions are the nominal values; millimeter figures are conversions at 1" = 25.4 mm, rounded to the nearest millimeter.
| Interval | Task |
|---|---|
| After every session | Clean, dry and (carbon steel) oil the blade |
| Weekly, heavy use | Check the mount for movement; check the handle-to-mount attachment |
| Monthly | Deep clean the blade; remove nicks and burrs with fine abrasive paper if needed; check the handle body for cracks |
| Quarterly | Full mount inspection; check blade flatness against a straightedge |
Flatness is what determines whether the tool can still produce a finish:

In compliance with EU personal data protection laws, we are committed to protecting and providing you with control over your personal data. By clicking "Accept All", you allow us to place cookies to enhance your experience on this site, help us analyze site performance and usage, and enable us to deliver relevant marketing content. You can manage your cookie settings below. By clicking "Agree" you agree to the current settings. For more information, please visit the Privacy Statement.
This website uses cookies
In compliance with EU personal data protection laws, we are committed to protecting your personal data and providing you with control over it. By clicking "Agree", you allow us to place cookies to improve your experience on this site, help us analyze site performance and usage, and allow us to deliver relevant marketing content.
By clicking "Only necessary" you allow us to place only necessary cookies. The website cannot function without these cookies and you cannot switch them off on your system. These cookies are typically set only in response to an action you perform (i.e. a service request), such as setting privacy preferences, logging in, or filling in a form. You can set your browser to block or prompt you for these cookies, but this may prevent some site features from working.



