
Copyright 2026 © Leading Tools Industrial Co., Ltd.
All Rights Reserved. Website Design by Awakening Design
CATALOG TYPE
Product Categories
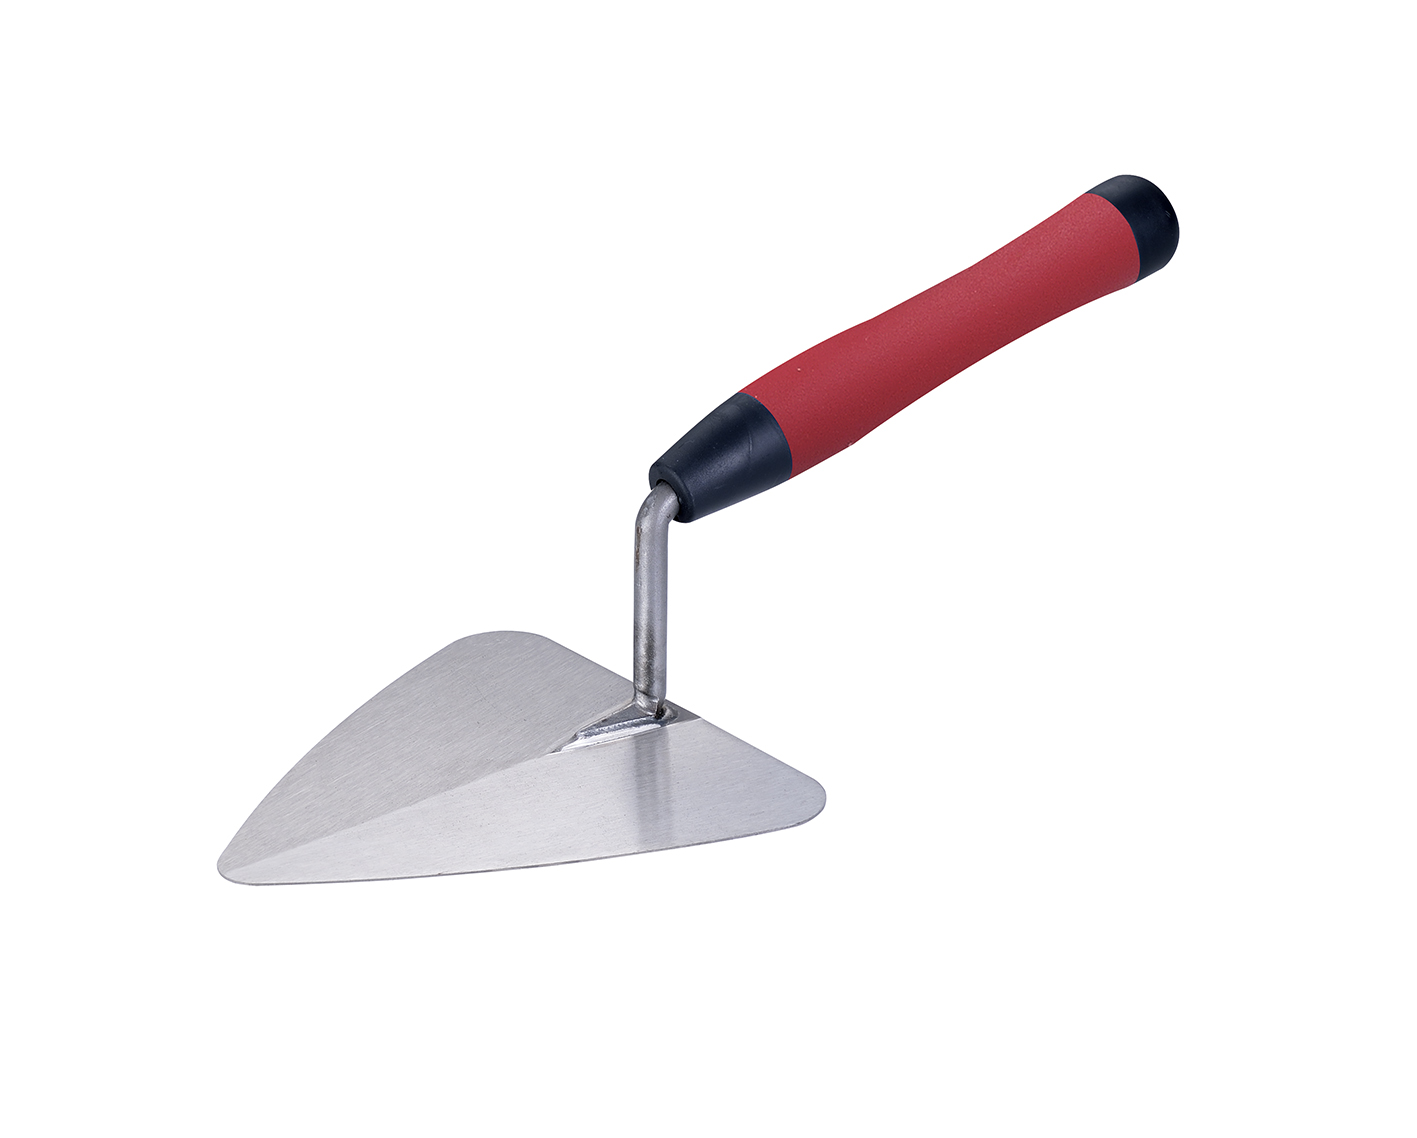
Triangle Trowel — CO2 Welded Carbon Steel
Product Description
Product name: Triangle Trowel
Construction line: CO2 Welded Carbon Steel
Art. Nr (two entries in this pattern):
Both entries are listed as "Triangle Trowel / CO2 Welded Carbon Steel": the same blade pattern and the same construction, in two sizes and with two handle specifications.
A "corner trowel" is a tool whose blade is bent through 90°, with the handle mounted at the center of the bend. That is a completely different construction from this flat triangular blade. This product is not a corner trowel; a buyer ordering a drywall/plaster corner tool should not order it.
One blade shape covers rendering and bricklaying. The triangle suits both: rendering wall surfaces, and picking up and placing mortar in normal bricklaying.
The tapering blade earns its keep at the pick-up. The technique for this tool is a specific one: the mortar is scooped, the trowel is flicked away from the board so that the inertia of the swing works for you, and the wrist rotates the blade toward vertical so the mortar is pressed onto the blade face rather than falling off it. The triangular plan is what lets the blade be rotated through that motion with the load staying on the face.
Two handles, one pattern. The soft grip version (260604) is for buyers who want comfort and a modern appearance; the wood-handled swan-neck version (810101) is for buyers who prefer a wood handle.
Carbon steel care. Carbon steel blades cost less, but they must be wiped dry and thinly oiled after use, or they will rust; it is the wrong choice for a crew that will not maintain it. See the Selection Guide for choosing the material and the Care & Maintenance section for the routine that keeps a carbon blade serviceable.
| Task | Use this trowel? | Basis |
|---|---|---|
| Rendering / plastering wall surfaces | Yes, primary use | The triangle suits both bricklaying and plastering |
| Picking up and placing mortar for bricklaying | Yes, primary use | The triangle suits both bricklaying and plastering |
| Filling and spreading a bed joint | Yes | Choose the 160 mm or 220 mm size to suit the unit |
| Patching, making good, working in confined places | Yes, with the smaller blade (260604) | Smaller blades in this pattern are the patching and finishing size |
| Finishing a 90° internal or external corner in plaster or drywall compound | No | That is a bent-blade corner trowel, with the handle at the center of a 90° bend: a different tool entirely |
| Burnishing a polished decorative finish | No | Wrong pattern for the job; burnishing needs a dedicated finishing trowel |
| Prying, levering, chipping, or striking | No | Not designed to be loaded as a lever |
How this pattern is worked is specific: the wrist movement in step 3 is what keeps the mortar on the blade.
| Step | Action |
|---|---|
| 1 | Scoop mortar from the tub or the mortar board with the blade |
| 2 | Sweep the trowel briskly away from the pick-up point, using the inertia of the swing |
| 3 | Rotate the wrist so the blade face turns toward vertical |
| 4 | Let that rotation press the mortar against the blade face, so it is held ready to be laid on the wall or into the joint |
General plastering practice, not specific to this blade shape but directly applicable: hold the blade at roughly 30° to the wall when applying a scratch or base coat, and flatten to roughly 15° for the levelling pass, working close to the surface in long horizontal strokes.
Load the blade with the technique above, lay the material on with the blade at roughly 30°, then come back over it at roughly 15° to level. The taper of the blade means the effective working width narrows toward the toe; work from the heel end of the blade for spreading, and use the toe for cutting into the edge of the previous pass.
Choose the blade size first (see the Selection Guide, Step 1); if one pick-up does not carry enough mortar for the unit, use the larger size. Lay the bed, place the unit, and tap to line and level. This pattern is used for bricklaying alongside plastering, but note that this is not the pointed pattern: to carry mortar to the edge of a joint use the Pointed Triangle Trowel, and to press and compact mortar into the joint use the Tuck Pointing Trowel or the Brick Jointer.
The small blades in this pattern are the patching tool. The 160 mm 260604 loads a small charge, fits where a 220 mm blade will not swing, and lets the user work close to an edge without fouling adjacent finished surfaces. This is the size to specify for maintenance crews, renovation work and snagging rather than for production rendering.
Q1. What is this tool used for, and is it a corner trowel?
It is used for both bricklaying and plastering; it is a tool for picking up and spreading mortar. For rendering, hold it at about 30° to the wall for the base coat and about 15° for the levelling pass, in long horizontal strokes. It is not a corner trowel, which has a blade bent through 90° for internal and external plaster and drywall corners; this product has a flat triangular blade.
Q2. Which size should I order?
There are two sizes: 260604 at 160 mm with the soft grip handle, and 810101 at 220 mm with a wood handle on a swan-neck shank. The 220 mm 810101 is the larger size for general bricklaying and rendering, and the 160 mm 260604 suits smaller units, patching and making-good work, or confined access.
Q3. What is the difference between this and the Pointed Triangle Trowel?
The blade shape. 260604 here has a rounded triangular blade and 810101 is a triangle (see the product photo), while the Pointed Triangle Trowel (281621, 282621, 283621 and 892621, 893621) comes to a sharp point. The Triangle Trowel suits picking up and spreading mortar for bricklaying and plastering, and the pointed one suits picking up small amounts of mortar, patching and carrying mortar to the edge of the joint.
Q4. My blade is rusting, or mortar will not release cleanly. What do I do?
Rust is almost always one of three things: not dried fully after cleaning, stored in a damp bag or wet place, or mortar left on the blade between sessions.
Fix the routine (clean, dry, oil, store dry), and take existing surface rust back with a fine abrasive or rust eraser and re-oil. If mortar will not release, clean the blade thoroughly with detergent, work it through mortar for several passes and adjust the mix, and wipe off any protective oil film before starting work.
Q5. What should I check on the tool, and what should I never do to it?
Inspect the blade-to-shank junction for cracks, separation and corrosion whenever you clean the tool, and stop using a trowel where the joint is suspect.
On the wood-handled 810101, keep the handle out of standing water, check before each session that the handle is tight on the shank, and retire the tool if the steel moves inside the handle under load. Do not regrind the blade to a different shape; if impact has deformed it enough to affect the work, replace the trowel.
Seen from above, the blade is a triangle: wide across the heel where the shank is welded on, narrowing toward the toe. 260604 has a rounded triangular blade; 810101 is a triangle (see the product photo).
The Pointed Triangle Trowel in the Leading Tools range is a separate product:
| Blade family | Art numbers | Plan-view shape | Toe | Role |
|---|---|---|---|---|
| Triangle Trowel (this product) | 260604, 810101 | Triangle, tapering from a wide heel | 260604 rounded; 810101 see product photo | Picking up and spreading mortar for bricklaying and general plastering |
| Pointed Triangle Trowel | 281621, 282621, 283621; 892621, 893621 | Triangle | Sharp point | Picking up small amounts of mortar, patching and small rebuilds, and carrying mortar to the edge of the joint |
This line is identified as "CO2 Welded Carbon Steel". The blade and the shank are produced as separate parts and joined at the heel.
| 260604 | 810101 | |
|---|---|---|
| Handle | Soft grip handle | Wood handle |
| Shank | Cranked shank | Swan neck: a deep S-curve |
A buyer choosing between the two art numbers is choosing between a soft grip handle on a cranked shank and a wood handle on a swan-neck shank, in two sizes. Other handles can be fitted on request: contact Leading Tools sales.
| Attribute | 260604 | 810101 |
|---|---|---|
| Product name | Triangle Trowel | Triangle Trowel |
| Construction line | CO2 Welded Carbon Steel | CO2 Welded Carbon Steel |
| Blade pattern | Rounded triangle | Triangle (see product photo) |
| Blade size | 160 mm (6-5/16") | 220 mm (8-11/16") |
| Blade material | Carbon steel | Carbon steel |
| Shank | Cranked shank | Swan neck |
| Handle | Soft grip handle | Wood handle |
Choose the blade size against the work you actually do: 160 mm for smaller units and repair work, 220 mm for general bricklaying and rendering.
| Blade size | Art number | Where it sits | Best suited to |
|---|---|---|---|
| 160 mm | 260604 | The smaller size | Smaller units; patching and making-good work; confined places where a full-size blade cannot be swung |
| 220 mm | 810101 | The larger size | General bricklaying; continuous rendering of larger wall areas |
260604 at 160 mm is the small, close-work and repair size; 810101 at 220 mm is the larger size for everyday production work.
| If the buyer… | Specify | Why |
|---|---|---|
| Prefers a wood handle, or replaces an existing wood-handled triangle trowel | 810101: wood handle, swan-neck shank | The larger size, with a wood handle |
| Sells on comfort and modern appearance | 260604: soft grip | Soft grip is the mainstream specification across the rest of the Leading Tools brick trowel range |
| Works in continuously wet conditions | Consider the handle carefully | A wood handle in permanently wet service will swell and check over time |
Both art numbers in this pattern are carbon steel. The art numbers listed for this pattern are carbon steel; for a stainless version, contact Leading Tools sales. The neighbouring Heart Trowel in the Leading Tools range is listed in both materials (263604 carbon / 263304 stainless).
| Carbon steel (what this product is) | Stainless steel | |
|---|---|---|
| Corrosion | Will rust if not dried and oiled after use | High corrosion resistance and low maintenance; chlorinated water, coastal air or prolonged soaking can still cause rust spots, so rinse with clean water and dry after use |
| Right call when | The crew cleans, dries and oils tools after every use | The tool lives in wet work, or maintenance discipline cannot be relied on |
Where the work is continuously wet, contact Leading Tools sales.
| Need | Leading Tools answer | Art numbers |
|---|---|---|
| Render large areas, and pick up and bed mortar with one tool | Triangle Trowel (this product) | 260604, 810101 |
| Pick up small amounts of mortar, patch and carry mortar to the edge of the joint | Pointed Triangle Trowel, sharp-toed | 281621 / 282621 / 283621; 892621 / 893621 |
| Press and compact mortar into the joint | Tuck Pointing Trowel or Brick Jointer | See their product pages |
| The same welded carbon construction in a heart/kidney blade | Heart Trowel | 263604 |
| The same blade in stainless for wet or lime work | Heart Trowel, spot-welded stainless | 263304 |
| A small squared-toe blade for filling corners, smoothing and patching | European Margin Trowel, 30–120 mm | 243621–248621, 240621, 242621 (CO2 carbon); 243821–248821, 240821, 242821 (stainless) |
Art numbers for the Triangle Trowel / CO2 Welded Carbon Steel:
| ART. NR | Blade size | Construction | Shank | Handle |
|---|---|---|---|---|
| 260604 | 160 mm | CO2 Welded Carbon Steel | Cranked shank | Soft grip handle |
| 810101 | 220 mm | CO2 Welded Carbon Steel | Swan neck | Wood handle |
Two art numbers, two sizes.
Rinse the blade with clean water as soon as the work stops. Carbon steel rusts when it stays wet, and mortar left to cure on the blade holds moisture against the steel. For partly hardened material, soak the blade and lift the residue with a wooden or plastic scraper rather than a metal one. Then dry the blade completely: a carbon blade that is put away damp will flash-rust overnight.
After cleaning and drying, wipe a light film of machine oil or a dedicated tool oil over both blade faces. Wipe the excess off before the next use so it does not contaminate the work. This single habit is the difference between a carbon steel trowel that lasts and one that is pitted within a season, and it is why stainless is the better choice for a crew that does not maintain its tools.
Lime mortar deserves extra attention. Mortar residue holds water against the steel. If the tool is used on lime work, clean and oil it at every break, not just at the end of the day.
Store the trowel flat or hung so the blade cannot take a permanent set, and use a blade guard to protect the edge if the tool travels in a bag with other tools. Do not leave it outdoors, in a damp tool bag, or standing in a bucket.
Soft grip handle (260604): wash with mild soap and water; do not use solvents. Retire the tool if the grip is torn or peeling.
Wood handle (810101): keep the wood out of prolonged immersion: a wooden handle left standing in water will swell, then check and loosen as it dries. A very light wipe of linseed or a comparable finishing oil will keep the timber from drying out. Check that the handle is tight and does not turn on the shank before each session.
Product name: Triangle Trowel
Construction line: CO2 Welded Carbon Steel
Art. Nr (two entries in this pattern):
Both entries are listed as "Triangle Trowel / CO2 Welded Carbon Steel": the same blade pattern and the same construction, in two sizes and with two handle specifications.
A "corner trowel" is a tool whose blade is bent through 90°, with the handle mounted at the center of the bend. That is a completely different construction from this flat triangular blade. This product is not a corner trowel; a buyer ordering a drywall/plaster corner tool should not order it.
One blade shape covers rendering and bricklaying. The triangle suits both: rendering wall surfaces, and picking up and placing mortar in normal bricklaying.
The tapering blade earns its keep at the pick-up. The technique for this tool is a specific one: the mortar is scooped, the trowel is flicked away from the board so that the inertia of the swing works for you, and the wrist rotates the blade toward vertical so the mortar is pressed onto the blade face rather than falling off it. The triangular plan is what lets the blade be rotated through that motion with the load staying on the face.
Two handles, one pattern. The soft grip version (260604) is for buyers who want comfort and a modern appearance; the wood-handled swan-neck version (810101) is for buyers who prefer a wood handle.
Carbon steel care. Carbon steel blades cost less, but they must be wiped dry and thinly oiled after use, or they will rust; it is the wrong choice for a crew that will not maintain it. See the Selection Guide for choosing the material and the Care & Maintenance section for the routine that keeps a carbon blade serviceable.
| Task | Use this trowel? | Basis |
|---|---|---|
| Rendering / plastering wall surfaces | Yes, primary use | The triangle suits both bricklaying and plastering |
| Picking up and placing mortar for bricklaying | Yes, primary use | The triangle suits both bricklaying and plastering |
| Filling and spreading a bed joint | Yes | Choose the 160 mm or 220 mm size to suit the unit |
| Patching, making good, working in confined places | Yes, with the smaller blade (260604) | Smaller blades in this pattern are the patching and finishing size |
| Finishing a 90° internal or external corner in plaster or drywall compound | No | That is a bent-blade corner trowel, with the handle at the center of a 90° bend: a different tool entirely |
| Burnishing a polished decorative finish | No | Wrong pattern for the job; burnishing needs a dedicated finishing trowel |
| Prying, levering, chipping, or striking | No | Not designed to be loaded as a lever |
How this pattern is worked is specific: the wrist movement in step 3 is what keeps the mortar on the blade.
| Step | Action |
|---|---|
| 1 | Scoop mortar from the tub or the mortar board with the blade |
| 2 | Sweep the trowel briskly away from the pick-up point, using the inertia of the swing |
| 3 | Rotate the wrist so the blade face turns toward vertical |
| 4 | Let that rotation press the mortar against the blade face, so it is held ready to be laid on the wall or into the joint |
General plastering practice, not specific to this blade shape but directly applicable: hold the blade at roughly 30° to the wall when applying a scratch or base coat, and flatten to roughly 15° for the levelling pass, working close to the surface in long horizontal strokes.
Load the blade with the technique above, lay the material on with the blade at roughly 30°, then come back over it at roughly 15° to level. The taper of the blade means the effective working width narrows toward the toe; work from the heel end of the blade for spreading, and use the toe for cutting into the edge of the previous pass.
Choose the blade size first (see the Selection Guide, Step 1); if one pick-up does not carry enough mortar for the unit, use the larger size. Lay the bed, place the unit, and tap to line and level. This pattern is used for bricklaying alongside plastering, but note that this is not the pointed pattern: to carry mortar to the edge of a joint use the Pointed Triangle Trowel, and to press and compact mortar into the joint use the Tuck Pointing Trowel or the Brick Jointer.
The small blades in this pattern are the patching tool. The 160 mm 260604 loads a small charge, fits where a 220 mm blade will not swing, and lets the user work close to an edge without fouling adjacent finished surfaces. This is the size to specify for maintenance crews, renovation work and snagging rather than for production rendering.
Q1. What is this tool used for, and is it a corner trowel?
It is used for both bricklaying and plastering; it is a tool for picking up and spreading mortar. For rendering, hold it at about 30° to the wall for the base coat and about 15° for the levelling pass, in long horizontal strokes. It is not a corner trowel, which has a blade bent through 90° for internal and external plaster and drywall corners; this product has a flat triangular blade.
Q2. Which size should I order?
There are two sizes: 260604 at 160 mm with the soft grip handle, and 810101 at 220 mm with a wood handle on a swan-neck shank. The 220 mm 810101 is the larger size for general bricklaying and rendering, and the 160 mm 260604 suits smaller units, patching and making-good work, or confined access.
Q3. What is the difference between this and the Pointed Triangle Trowel?
The blade shape. 260604 here has a rounded triangular blade and 810101 is a triangle (see the product photo), while the Pointed Triangle Trowel (281621, 282621, 283621 and 892621, 893621) comes to a sharp point. The Triangle Trowel suits picking up and spreading mortar for bricklaying and plastering, and the pointed one suits picking up small amounts of mortar, patching and carrying mortar to the edge of the joint.
Q4. My blade is rusting, or mortar will not release cleanly. What do I do?
Rust is almost always one of three things: not dried fully after cleaning, stored in a damp bag or wet place, or mortar left on the blade between sessions.
Fix the routine (clean, dry, oil, store dry), and take existing surface rust back with a fine abrasive or rust eraser and re-oil. If mortar will not release, clean the blade thoroughly with detergent, work it through mortar for several passes and adjust the mix, and wipe off any protective oil film before starting work.
Q5. What should I check on the tool, and what should I never do to it?
Inspect the blade-to-shank junction for cracks, separation and corrosion whenever you clean the tool, and stop using a trowel where the joint is suspect.
On the wood-handled 810101, keep the handle out of standing water, check before each session that the handle is tight on the shank, and retire the tool if the steel moves inside the handle under load. Do not regrind the blade to a different shape; if impact has deformed it enough to affect the work, replace the trowel.
Seen from above, the blade is a triangle: wide across the heel where the shank is welded on, narrowing toward the toe. 260604 has a rounded triangular blade; 810101 is a triangle (see the product photo).
The Pointed Triangle Trowel in the Leading Tools range is a separate product:
| Blade family | Art numbers | Plan-view shape | Toe | Role |
|---|---|---|---|---|
| Triangle Trowel (this product) | 260604, 810101 | Triangle, tapering from a wide heel | 260604 rounded; 810101 see product photo | Picking up and spreading mortar for bricklaying and general plastering |
| Pointed Triangle Trowel | 281621, 282621, 283621; 892621, 893621 | Triangle | Sharp point | Picking up small amounts of mortar, patching and small rebuilds, and carrying mortar to the edge of the joint |
This line is identified as "CO2 Welded Carbon Steel". The blade and the shank are produced as separate parts and joined at the heel.
| 260604 | 810101 | |
|---|---|---|
| Handle | Soft grip handle | Wood handle |
| Shank | Cranked shank | Swan neck: a deep S-curve |
A buyer choosing between the two art numbers is choosing between a soft grip handle on a cranked shank and a wood handle on a swan-neck shank, in two sizes. Other handles can be fitted on request: contact Leading Tools sales.
| Attribute | 260604 | 810101 |
|---|---|---|
| Product name | Triangle Trowel | Triangle Trowel |
| Construction line | CO2 Welded Carbon Steel | CO2 Welded Carbon Steel |
| Blade pattern | Rounded triangle | Triangle (see product photo) |
| Blade size | 160 mm (6-5/16") | 220 mm (8-11/16") |
| Blade material | Carbon steel | Carbon steel |
| Shank | Cranked shank | Swan neck |
| Handle | Soft grip handle | Wood handle |
Choose the blade size against the work you actually do: 160 mm for smaller units and repair work, 220 mm for general bricklaying and rendering.
| Blade size | Art number | Where it sits | Best suited to |
|---|---|---|---|
| 160 mm | 260604 | The smaller size | Smaller units; patching and making-good work; confined places where a full-size blade cannot be swung |
| 220 mm | 810101 | The larger size | General bricklaying; continuous rendering of larger wall areas |
260604 at 160 mm is the small, close-work and repair size; 810101 at 220 mm is the larger size for everyday production work.
| If the buyer… | Specify | Why |
|---|---|---|
| Prefers a wood handle, or replaces an existing wood-handled triangle trowel | 810101: wood handle, swan-neck shank | The larger size, with a wood handle |
| Sells on comfort and modern appearance | 260604: soft grip | Soft grip is the mainstream specification across the rest of the Leading Tools brick trowel range |
| Works in continuously wet conditions | Consider the handle carefully | A wood handle in permanently wet service will swell and check over time |
Both art numbers in this pattern are carbon steel. The art numbers listed for this pattern are carbon steel; for a stainless version, contact Leading Tools sales. The neighbouring Heart Trowel in the Leading Tools range is listed in both materials (263604 carbon / 263304 stainless).
| Carbon steel (what this product is) | Stainless steel | |
|---|---|---|
| Corrosion | Will rust if not dried and oiled after use | High corrosion resistance and low maintenance; chlorinated water, coastal air or prolonged soaking can still cause rust spots, so rinse with clean water and dry after use |
| Right call when | The crew cleans, dries and oils tools after every use | The tool lives in wet work, or maintenance discipline cannot be relied on |
Where the work is continuously wet, contact Leading Tools sales.
| Need | Leading Tools answer | Art numbers |
|---|---|---|
| Render large areas, and pick up and bed mortar with one tool | Triangle Trowel (this product) | 260604, 810101 |
| Pick up small amounts of mortar, patch and carry mortar to the edge of the joint | Pointed Triangle Trowel, sharp-toed | 281621 / 282621 / 283621; 892621 / 893621 |
| Press and compact mortar into the joint | Tuck Pointing Trowel or Brick Jointer | See their product pages |
| The same welded carbon construction in a heart/kidney blade | Heart Trowel | 263604 |
| The same blade in stainless for wet or lime work | Heart Trowel, spot-welded stainless | 263304 |
| A small squared-toe blade for filling corners, smoothing and patching | European Margin Trowel, 30–120 mm | 243621–248621, 240621, 242621 (CO2 carbon); 243821–248821, 240821, 242821 (stainless) |
Art numbers for the Triangle Trowel / CO2 Welded Carbon Steel:
| ART. NR | Blade size | Construction | Shank | Handle |
|---|---|---|---|---|
| 260604 | 160 mm | CO2 Welded Carbon Steel | Cranked shank | Soft grip handle |
| 810101 | 220 mm | CO2 Welded Carbon Steel | Swan neck | Wood handle |
Two art numbers, two sizes.
Rinse the blade with clean water as soon as the work stops. Carbon steel rusts when it stays wet, and mortar left to cure on the blade holds moisture against the steel. For partly hardened material, soak the blade and lift the residue with a wooden or plastic scraper rather than a metal one. Then dry the blade completely: a carbon blade that is put away damp will flash-rust overnight.
After cleaning and drying, wipe a light film of machine oil or a dedicated tool oil over both blade faces. Wipe the excess off before the next use so it does not contaminate the work. This single habit is the difference between a carbon steel trowel that lasts and one that is pitted within a season, and it is why stainless is the better choice for a crew that does not maintain its tools.
Lime mortar deserves extra attention. Mortar residue holds water against the steel. If the tool is used on lime work, clean and oil it at every break, not just at the end of the day.
Store the trowel flat or hung so the blade cannot take a permanent set, and use a blade guard to protect the edge if the tool travels in a bag with other tools. Do not leave it outdoors, in a damp tool bag, or standing in a bucket.
Soft grip handle (260604): wash with mild soap and water; do not use solvents. Retire the tool if the grip is torn or peeling.
Wood handle (810101): keep the wood out of prolonged immersion: a wooden handle left standing in water will swell, then check and loosen as it dries. A very light wipe of linseed or a comparable finishing oil will keep the timber from drying out. Check that the handle is tight and does not turn on the shank before each session.

In compliance with EU personal data protection laws, we are committed to protecting and providing you with control over your personal data. By clicking "Accept All", you allow us to place cookies to enhance your experience on this site, help us analyze site performance and usage, and enable us to deliver relevant marketing content. You can manage your cookie settings below. By clicking "Agree" you agree to the current settings. For more information, please visit the Privacy Statement.
This website uses cookies
In compliance with EU personal data protection laws, we are committed to protecting your personal data and providing you with control over it. By clicking "Agree", you allow us to place cookies to improve your experience on this site, help us analyze site performance and usage, and allow us to deliver relevant marketing content.
By clicking "Only necessary" you allow us to place only necessary cookies. The website cannot function without these cookies and you cannot switch them off on your system. These cookies are typically set only in response to an action you perform (i.e. a service request), such as setting privacy preferences, logging in, or filling in a form. You can set your browser to block or prompt you for these cookies, but this may prevent some site features from working.



